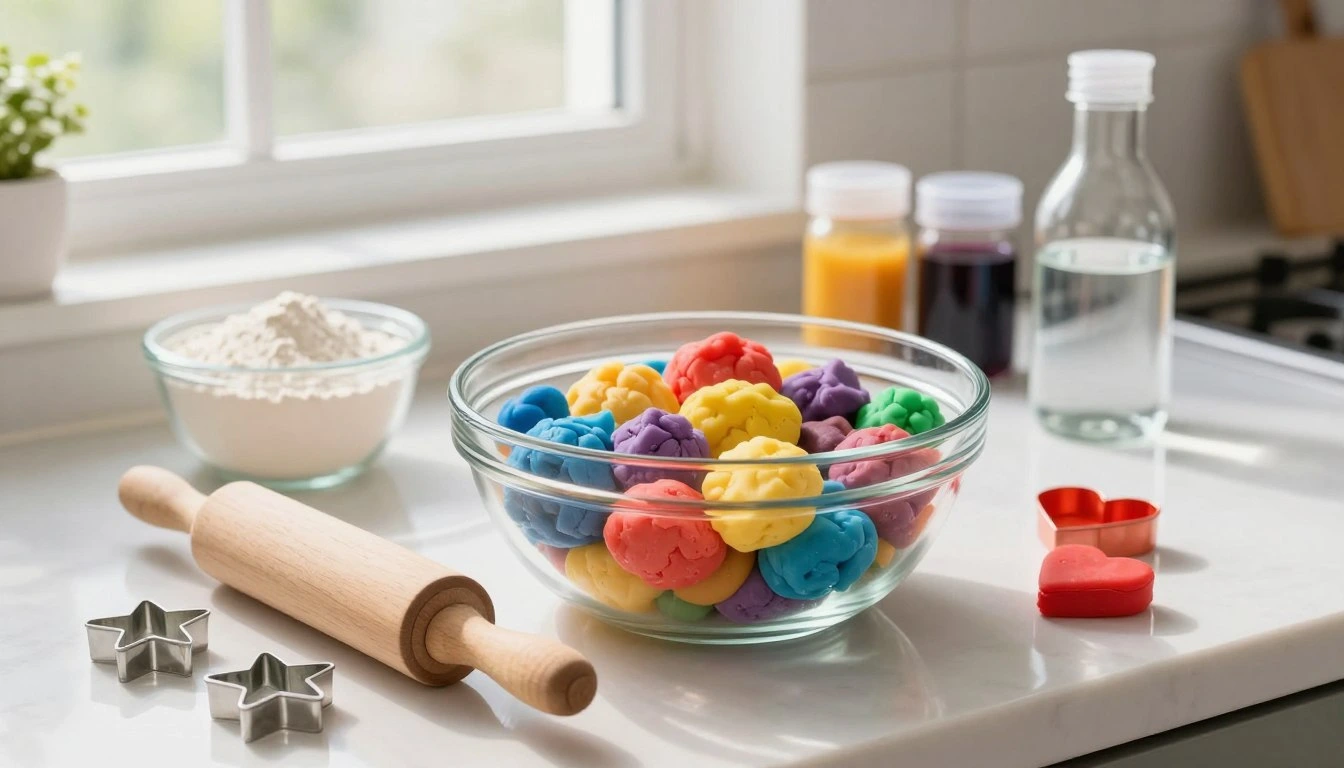
How Can You Make Play Doh at Home with Simple Ingredients
Table of Contents
How Can You Make Play Doh at Home with Simple Ingredients
Do you remember the soft, salty scent of modeling clay from your childhood? It’s magical to squish warm, colorful dough between your fingers. Your imagination runs wild.
Now, you can make that joy in your kitchen with basic items. A homemade playdough no cook version is great for bonding with family on a rainy day.
It turns a quiet kitchen into a vibrant studio of tiny sculptures and bright ideas. This easy playdough recipe guide will teach you to make your own fun.
Building things with your hands makes you feel accomplished. You’ll learn to mix, knead, and create with safe materials. Let’s explore the world of creative crafting and see how these items become hours of fun.

Key Takeaways
- Use common household items for budget-friendly crafting.
- Enjoy a quick activity without using high heat.
- Encourage fine motor skills and sensory exploration in children.
- Personalize your modeling materials with custom colors and scents.
- Create lasting memories through interactive family DIY projects.
- Save money compared to buying pre-packaged sets.
Why You Should Make Your Own Playdough at Home
Making playdough at home has many benefits. It’s easy to make simple homemade playdough and it’s fun. You can enjoy advantages not found in store-bought playdough.
Cost Savings Compared to Store-Bought Options
One big reason to make your own playdough is the money you save. Store-bought playdough can cost a lot, especially if you buy it often. But, making DIY playdough without cooking at home is cheap. You likely have the ingredients already.
Homemade playdough is even more cost-effective because you can make a lot at once. Then, you can divide it and save it for later.
Control Over Ingredients for Safety
Another great thing about making your own playdough is the control over what goes into it. This is especially important for parents who want to keep their kids safe. By picking the ingredients yourself, you can make sure they’re safe for your kids to play with.
This control also means you can avoid any ingredients that might cause an allergic reaction. So, homemade playdough is a safer choice than store-bought.
Customization Possibilities
When you make playdough at home, you can make it your own. You can try out different colors, textures, and even add-ins. This way, you can create playdough that your kids will love.
With options like glitter, essential oils, and different flours, the possibilities are endless. You can make playdough that matches your child’s interests and preferences.
Essential Ingredients for Homemade Playdough No Cook
Making playdough at home means you can pick what goes into it. This makes it safe and fun for kids.
To make a basic no-cook playdough, you need a few key ingredients. Each one is important for the playdough’s texture, how long it lasts, and how well it works.
All-Purpose Flour as the Base
All-purpose flour is the base of your playdough. It gives it structure and texture. It also helps hold the other ingredients together.
Salt for Preservation and Texture
Salt adds texture and keeps the playdough fresh. It stops mold and bacteria from growing, so your playdough stays good longer.
Cream of Tartar for Elasticity
Cream of tartar makes the playdough stretchy. It makes the dough smooth and easy to shape.
Vegetable Oil for Smoothness
Vegetable oil makes the playdough smooth. It keeps the dough from getting too dry or crumbly.
Water to Bind Everything Together
Water mixes all the dry ingredients together. It makes a dough that sticks together. You can change how much water you use to get the right feel.
Here’s a quick list of what you need and why:
- All-purpose flour: Gives structure and texture
- Salt: Adds texture and keeps it fresh
- Cream of tartar: Makes it stretchy
- Vegetable oil: Makes it smooth
- Water: Holds it all together
Kitchen Tools and Supplies You’ll Need
The right tools make a big difference in making perfect no-bake playdough. Having the right kitchen tools and supplies makes the process smooth and fun.
Mixing Bowls and Measuring Tools
You’ll need a big mixing bowl to mix your ingredients. A stainless steel or plastic bowl is best because it’s easy to clean and lasts long. You’ll also need measuring cups and spoons to measure the ingredients right. Getting the measurements right is important for the playdough’s texture and feel.
Using the right measuring tools is key for DIY crafts, as a study shows. Craft experts say, “Measuring ingredients accurately is crucial for achieving the desired consistency and texture in homemade playdough.”
“Measuring ingredients accurately is crucial for achieving the desired consistency and texture in homemade playdough.”
Craft Experts
Stirring Utensils
You’ll need a strong spoon or spatula to mix the playdough well. You might also use a stand mixer or hand mixer for big batches. The mixing should be smooth and thorough, making sure all ingredients mix well.
Storage Containers
After making the playdough, you’ll need containers to keep it fresh. Airtight containers or plastic bags work best because they keep moisture in. It’s smart to label the containers with the date and details like color or scent.
| Tool/Supply | Description | Importance |
|---|---|---|
| Mixing Bowl | Large bowl for combining ingredients | High |
| Measuring Cups/Spoons | For accurate measurement of ingredients | High |
| Spoon/Spatula | For mixing ingredients thoroughly | Medium |
| Airtight Containers | For storing playdough | High |
Step-by-Step Instructions for No-Cook Playdough
You can make your own no-cook playdough with common items. It’s fun and teaches kids about measuring and mixing.
Step 1: Measure and Combine Dry Ingredients
First, measure 2 cups of all-purpose flour and 1/2 cup of salt into a big bowl. Add 2 tablespoons of cream of tartar. Mix these dry ingredients well until they’re combined.
Step 2: Mix Wet Ingredients Separately
In another bowl, mix 1/4 cup of vegetable oil and 1/2 cup of water. You can add a few drops of food coloring for color. Make sure the color is spread out by stirring well.
Step 3: Combine Wet and Dry Mixtures
Pour the wet ingredients into the dry ones slowly, stirring all the time. The mix will start to form a dough.
Step 4: Knead Until Smooth
Knead the dough on a floured surface until it’s smooth. If it’s too sticky, add more flour. Kneading is key for the right texture.
Step 5: Check Consistency and Adjust
After kneading, check if the dough is right. If it’s too dry, add water. If too wet, add flour. You want it to be smooth and pliable for fun play.
By following these steps, you can make your own homemade playdough no cook for kids. This easy recipe is great for endless creativity and fun.
Adding Colors to Your DIY Playdough
Making your own playdough lets you pick the colors you like. You can make many colors and shades. This way, you can match your child’s favorite colors or a theme.
There are many ways to color your homemade playdough. Food coloring is common, but you can also try natural options for a greener choice.
Food Coloring Options
Food coloring is a favorite for playdough because it’s easy to find and vibrant. Just add a few drops to your dough to get the color you want. Start with a little and add more until it’s the right shade.
Tip: Mixing colors can make new shades. For example, red and blue make purple.
Natural Coloring Alternatives
For a natural look, use beets, turmeric, or spinach. These can make soft colors or deeper ones.
- Beets make pink or red.
- Turmeric makes yellow or orange.
- Spinach makes green.
Techniques for Even Color Distribution
To get even color, mix well. Add the color while mixing or knead it in later.
For perfect color, mix the color into wet ingredients first. Then add the dry ingredients. This avoids streaks or uneven color.
Creative Add-Ins for Sensory Enhancement
To make your homemade playdough even better, add some creative elements. These can make it more fun and engaging for kids.
Adding different textures and scents can enhance the playdough. You can do this by mixing in various ingredients.
Essential Oils for Pleasant Scents
Essential oils can make your playdough smell nice. Lavender, peppermint, and lemon are popular choices. But, make sure to pick kid-safe options and dilute them right to avoid skin problems.
Always check the purity and safety of the essential oils before using them in your playdough.
Glitter and Sparkles for Visual Appeal
Glitter or sparkles can make your playdough look amazing. Use fine glitter, sequins, or crushed beads for extra sparkle. Just mix them well so they’re evenly spread.

Extracts for Kid-Safe Fragrances
For a safer scent option, try vanilla or almond extract. They add a nice smell to your playdough without the risk of skin irritation.
Here’s a comparison of different add-ins you can use in your simple homemade playdough:
| Add-in | Purpose | Safety Consideration |
|---|---|---|
| Essential Oils | Pleasant scents | Must be kid-safe and diluted properly |
| Glitter/Sparkles | Visual appeal | May be a choking hazard for very young children |
| Extracts | Kid-safe fragrances | Generally considered safe, but check for allergies |
As one expert notes, “The sensory experience of playdough is as important as the creative aspect. Adding different textures and scents makes it more fun and engaging for kids.”
“The use of sensory play materials like playdough can have a significant impact on a child’s cognitive and motor skill development.”
Troubleshooting Common Playdough Problems
When making homemade playdough, you might run into some common issues. These problems can be fixed with a few simple changes. Knowing how to solve these issues will make your playdough experience better.
Fixing Sticky Playdough
Sticky playdough can be annoying, but it’s easy to fix. If your playdough is too sticky, add a little flour slowly until it’s right. But be careful not to add too much flour, or it will dry out.
Tip: Adding a small amount of vegetable oil can also help if the playdough is too dry or sticky.
Addressing Crumbly or Dry Texture
If your playdough is crumbly or dry, it might need more moisture. Try adding a bit more water or oil and mix well until it’s smooth.
Prevention is key: To avoid dry playdough, store it in an airtight container when not in use.
Solving Color Bleeding Issues
Color bleeding can happen if colors aren’t mixed well or if the dough is too wet. To avoid this, mix the colors thoroughly into the dough. If it still happens, use less water or add a bit more flour.
Preventing Graininess
Graininess in playdough usually comes from undissolved ingredients, like salt. To avoid graininess, mix dry ingredients well before adding wet ones. If graininess still happens, knead the dough until it’s smooth.
Here’s a quick guide to common playdough problems and how to fix them:
| Issue | Solution |
|---|---|
| Sticky Playdough | Add flour gradually or a bit of vegetable oil |
| Crumbly or Dry Texture | Add water or oil, store in airtight container |
| Color Bleeding | Mix colorants thoroughly, adjust moisture level |
| Graininess | Mix dry ingredients well, knead playdough thoroughly |
Proper Storage Methods to Keep Playdough Fresh
Keeping your homemade playdough no cook fresh is key. The right storage can make it last longer.
Storing your playdough right is crucial. Here are some tips to help you do it.
Airtight Container Requirements
An airtight container is essential for keeping your playdough fresh. It stops air from drying it out. Use plastic containers or zip-lock bags for storage.
Refrigeration Tips
Refrigerating your playdough can make it last longer. Put the container in the fridge to keep it cool. But make sure the container is sealed tight to avoid moisture damage.
Expected Shelf Life
The life of your homemade playdough no cook depends on storage. If stored right in an airtight container and in the fridge, it can last weeks to months. Always check for mold or dryness.
By following these tips, your homemade playdough will last longer.
Safety Considerations and Precautions
When making and using homemade playdough, safety is key. It’s generally safe, but precautions are needed. This ensures a fun and safe time for everyone.
Understanding the potential risks of homemade playdough is crucial. Knowing the ingredients and the children’s ages is important.
Age-Appropriate Usage Guidelines
The age of the child affects playdough safety. For kids under 3, the playdough must be non-toxic and safe if eaten. They often put things in their mouths.
Older kids can use playdough made with common ingredients. But, it’s still important to watch them. This prevents choking hazards or allergic reactions.
Allergy Warnings for Common Ingredients
Some playdough ingredients can cause allergies. Flour can be a problem for kids with wheat allergies. Some food colorings can irritate skin.
To make a safe playdough recipe, use hypoallergenic ingredients. Always ask parents about allergies before making playdough for kids.

Supervision Recommendations
Supervision is key when playing with homemade playdough. It helps spot and fix any issues fast.
It also lets you guide kids in using the playdough safely. This makes their playtime better and safer.
Fun Activities and Play Ideas
Now that you’ve made your own DIY playdough without cooking, it’s time to explore the numerous fun activities you can enjoy with it. Homemade playdough is not just a creative outlet but also a tool for learning and development.
There are various ways to engage with your homemade playdough, ranging from simple molding to more complex educational exercises. Here are some ideas to get you started:
Basic Shaping and Molding Games
Start with the basics by shaping and molding your playdough into different forms. You can create simple shapes like balls, snakes, or flat discs. As you get more comfortable, you can try making more complex shapes or objects.
Using Cookie Cutters and Tools
Cookie cutters can add a new dimension to your playdough experience. Use them to cut out fun shapes and designs. You can also incorporate other tools like rolling pins, shape makers, or even household items to create unique textures and patterns.
Educational Activities with Playdough
Playdough is not just for fun; it’s also a valuable educational tool. You can use it to teach children about shapes, colors, and textures. For example, you can create a shape-sorting game by making different shapes with your playdough and having children identify them.
| Activity | Age Group | Learning Benefit |
|---|---|---|
| Basic Shaping | 2-5 years | Fine motor skills, creativity |
| Using Cookie Cutters | 3-6 years | Shape recognition, creativity |
| Educational Activities | 4-8 years | Shape identification, color recognition, problem-solving |
As you explore these activities, you’ll find that homemade playdough is a versatile tool for both fun and education.
Comparing Homemade vs Store-Bought Playdough
The debate between homemade and store-bought playdough has been ongoing. Each side has its own advantages. It’s important to consider several key factors when deciding which is best for you and your child.
Parents often worry about the ingredients in playdough. Store-bought playdough may contain unknown chemicals and preservatives. This can be a concern for children with allergies or sensitivities.
Ingredient Transparency
Homemade playdough lets you control the ingredients. You can use organic or natural ingredients, making it healthier for your child. For example, a simple recipe might include flour, water, salt, and cream of tartar.
Store-bought playdough, on the other hand, may have artificial fragrances, colors, and preservatives. These are not found in homemade playdough.
Cost Comparison Over Time
Homemade playdough is also more cost-effective. The initial cost of ingredients might seem similar to buying store-bought playdough. However, making playdough at home can save money in the long run.
| Playdough Type | Initial Cost | Long-Term Cost |
|---|---|---|
| Homemade | $2.50 (initial ingredients) | $0.50 per batch (after initial purchase) |
| Store-Bought | $3-$5 per pack | $3-$5 per pack (ongoing cost) |
The table shows that homemade playdough costs less over time. After the initial purchase, each batch costs just $0.50.
Performance and Quality Differences
Homemade playdough can be customized to your child’s liking. You can adjust the texture or add specific scents. Store-bought playdough, while consistent, may not offer the same level of customization.
In conclusion, the choice between homemade and store-bought playdough depends on your priorities. If you value transparency, cost-effectiveness, and customization, homemade playdough is likely the better choice.
Conclusion
Now you know how to make homemade playdough without cooking. This means you can have fun with your kids without the cooking hassle. You can also pick your own colors and textures, making each playtime special.
Making playdough at home saves money and lets you choose what goes into it. This makes it safe and healthy for your kids to play and learn. Just flour, salt, and water are all you need to make great playdough.
With this recipe, you can make many different playdough colors and textures. Enjoy hours of fun and creativity with your kids. So, start making your own homemade playdough today!
Comparing Homemade vs Store-Bought Playdough
Cost Savings Compared to Store-Bought Options
One big advantage is the cost savings. Buying Play-Doh cans can get expensive, especially for big families or classrooms. Making a big batch at home is much cheaper, using things you likely have at home.
Control Over Ingredients for Safety
When you make it yourself, you know exactly what’s in it. You don’t have to worry about harmful chemicals or preservatives. Choosing safe ingredients means your little ones can play without worry.
Customization Possibilities
You can make it any color you want. Unlike store-bought, you can mix your own colors with Wilton icing or McCormick extracts. This lets you create a playdough that’s just right for your child.
All-Purpose Flour as the Base
All-purpose flour is the base of any simple homemade playdough. It gives the dough its shape and structure.
Salt for Preservation and Texture
Salt keeps the dough fresh by preventing mold and bacteria. It also makes the dough feel grainy yet smooth.
Cream of Tartar for Elasticity
Arm & Hammer baking soda or cream of tartar makes the dough stretchy. This is what makes playdough fun to play with.
Vegetable Oil for Smoothness
A bit of Mazola or Crisco oil keeps the dough soft. It also stops it from sticking to your hands or the table.
Water to Bind Everything Together
Hot water makes the flour proteins work. In a no-bake playdough method, boiling water is key to a smooth dough without a saucepan.
Mixing Bowls and Measuring Tools
You’ll need a big Pyrex bowl for the dry ingredients. Standard measuring cups help you get it right.
Stirring Utensils
A sturdy wooden spoon or a heavy-duty silicone spatula is best for mixing when the dough is hot and thick.
Storage Containers
Keep it fresh with Ziploc bags or Rubbermaid airtight containers when playtime is over.
Step 1: Measure and Combine Dry Ingredients
Whisk together flour, salt, and cream of tartar in your mixing bowl until they’re evenly mixed.
Step 2: Mix Wet Ingredients Separately
Combine boiling water, oil, and any liquid scents or colors in a separate heat-safe jug.
Step 3: Combine Wet and Dry Mixtures
Slowly pour the liquid into the dry ingredients, stirring constantly until a shaggy dough forms.
Step 4: Knead Until Smooth
Once it’s cool enough, knead the dough on a flat surface. This makes it smooth and removes lumps.
Step 5: Check Consistency and Adjust
If it’s too sticky, add a tablespoon of flour. If it’s too dry, add a little oil or water.
Food Coloring Options
Standard liquid food coloring works well, but gel colors give a brighter, more vibrant look without watering down the dough.
Natural Coloring Alternatives
For a chemical-free version, try beet juice for pink, turmeric for yellow, or matcha powder for soft green.
Techniques for Even Color Distribution
To get even color, add dye to the water before mixing. If adding it later, fold the dough over the color to avoid staining your hands.
Essential Oils for Pleasant Scents
A drop of lavender or peppermint oil can make playdough time relaxing and calming.
Glitter and Sparkles for Visual Appeal
Mix in some Crayola glitter for “galaxy” or “princess” themed dough that shines under light.
Extracts for Kid-Safe Fragrances
Using McCormick almond or lemon extracts adds a wonderful scent. It’s safe if a curious toddler tastes it.
Fixing Sticky Playdough
If your quick playdough recipe is too sticky, add more flour. Do it one teaspoon at a time until it’s right.
Addressing Crumbly or Dry Texture
Crumbly dough lacks moisture. Adding a small amount of vegetable oil can make it smooth again.
Solving Color Bleeding Issues
Color bleeding happens with too much dye. Use concentrated gels or let the dough rest for 10 minutes to fix it.
Preventing Graininess
If the dough feels gritty, it’s because the salt hasn’t dissolved. Boiling water helps dissolve it better in a no-cook playdough instructions set.
Airtight Container Requirements
Playdough needs to be stored in Tupperware or high-quality freezer bags. This keeps it from drying out.
Refrigeration Tips
In humid climates, refrigerating your dough keeps it fresh. It prevents it from getting sticky or sweaty.
Expected Shelf Life
With proper care, your homemade dough stays fresh and pliable for up to three months.
Age-Appropriate Usage Guidelines
Homemade dough is safer for kids over two. It’s best for those who have stopped putting everything in their mouths.
Allergy Warnings for Common Ingredients
Standard recipes have wheat (gluten). If allergies are a concern, use gluten-free flour blends instead.
Supervision Recommendations
Always watch your child during play. This prevents the dough from getting on carpets or being eaten in large amounts, as the high salt content is unhealthy.
Basic Shaping and Molding Games
Encourage fine motor skills by asking your child to roll “snakes” or make small spheres for a dough snowman.
Using Cookie Cutters and Tools
Use Wilton cookie cutters or plastic rolling pins. This lets children explore different shapes and patterns.
Educational Activities with Playdough
Use the dough to make letters or numbers. This provides a hands-on way for preschoolers to practice reading and math.
Ingredient Transparency
Store-bought dough often has petroleum-based binders. Your homemade version uses safe kitchen ingredients.
Cost Comparison Over Time
Over a year, making your own dough can save up to fifty dollars compared to buying it often.
Performance and Quality Differences
Many parents find homemade dough softer and lasts longer than store-bought. It doesn’t dry out quickly once opened.