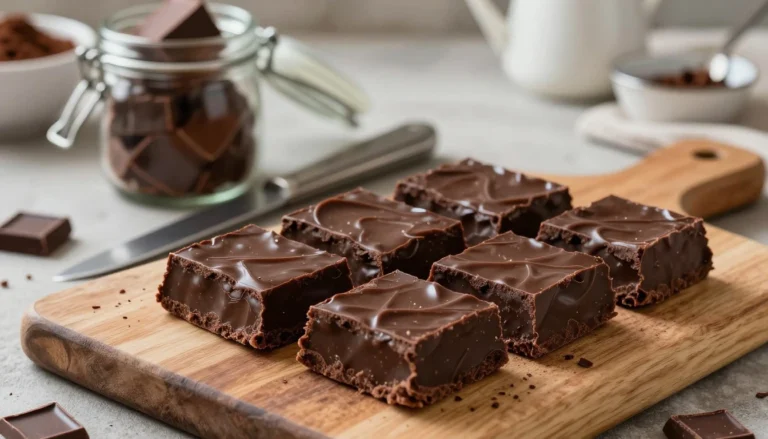
How to Make Chocolate Fudge Recipe with Condensed Milk
Table of Contents
How to Make Chocolate Fudge Recipe with Condensed Milk
Do you remember the sweet, velvety treats of your childhood holidays? There’s something magical about making a decadent dessert. It brings everyone together at the kitchen table.
You can make this easy chocolate fudge recipe without needing years of cooking experience. Using a simple homemade fudge with condensed milk method, you get a smooth, professional-quality treat. It melts in your mouth.

This guide shows you how to make a crowd-pleasing delight. It’s perfect for gifting or enjoying yourself. Let’s dive into the key techniques for perfect results every time.
Key Takeaways
- Learn the secrets to achieving a professional texture at home.
- Discover how to prepare a rich dessert using minimal ingredients.
- Master simple techniques that save time in the kitchen.
- Create the perfect edible gift for friends and family.
- Ensure consistent results for any special occasion or holiday.
The Science Behind Creamy Condensed Milk Fudge
Did you know fudge has a history dating back to the 17th century? It might have started as a mistake, turning caramels into a softer treat. Now, making creamy condensed milk fudge is all about understanding the chemistry in your bowl.
Understanding the Role of Sweetened Condensed Milk
Sweetened condensed milk is key to your recipe. It keeps your fudge firm but still creamy. This ingredient balances sugar and dairy, making it perfect.
Using this ingredient means you’re counting on several important things:
- Sugar concentration: It adds sweetness and controls crystals.
- Dairy proteins: These help the fudge hold its shape.
- Moisture control: It keeps the mix thick and stable.
Why Chocolate Quality Matters for Texture
The chocolate you pick affects your condensed milk fudge a lot. Good chocolate has more cocoa butter for a smooth taste. Bad chocolate can leave a greasy feel.
Choose chocolate with high cocoa content for the best taste. The cocoa butter works with the milk to make a dense, creamy fudge. Quality ingredients mean your condensed milk fudge will always be top-notch.
Essential Ingredients for Your Homemade Fudge
Every great confection starts with top-notch ingredients. To make the best chocolate fudge recipe, the quality of your ingredients matters a lot. It affects the texture and taste of your fudge.
Selecting the Best Cocoa Powder or Chocolate Chips
Choose high-quality baking chocolate bars over regular chocolate chips. Chips have stabilizers to keep their shape, which can make the fudge grainy.
For smooth fudge, chop dark or semi-sweet baking chocolate into small pieces. This way, your simple fudge recipe will be silky and even.
The Importance of High-Quality Butter
Butter is key for a rich, creamy texture in your dessert. Using high-fat, European-style butter makes it even more indulgent.
Butter balances the sweetness of condensed milk, creating a perfect flavor mix. Quality matters, so pick unsalted butter to control the salt.
Optional Add-ins for Flavor Enhancement
After mastering the basics, add mix-ins to enhance your fudge. Try adding toasted walnuts or pecans for a nice crunch.
For a deeper flavor, add a bit of pure vanilla extract or a pinch of sea salt. These touches turn a simple fudge recipe into a gourmet delight that will wow your guests.
Preparing Your Kitchen and Equipment
Success in the kitchen starts with the right equipment. Having everything ready before you start cooking is key. This ensures your quick condensed milk chocolate fudge turns out perfect every time.
Organizing your workspace helps reduce stress. It makes sure each step goes smoothly.
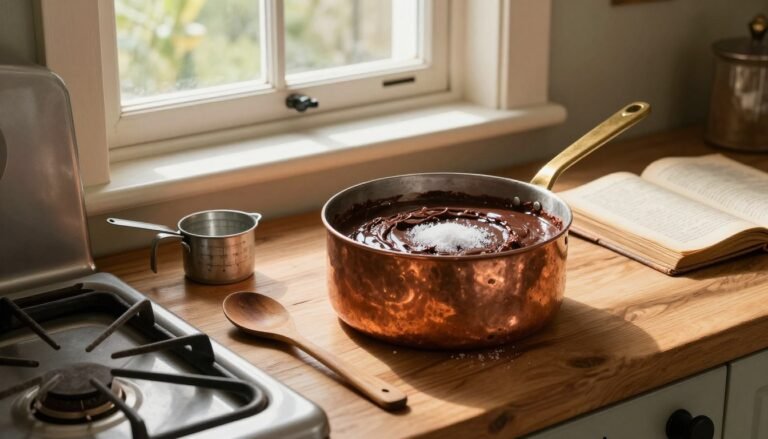
Choosing the Right Pan for Even Setting
The right pan is crucial for great fudge. A heavy-based saucepan is best because it heats evenly. This prevents the mixture from burning or scorching.
Why Parchment Paper is Your Best Friend
Using parchment paper is a smart move. It makes your quick condensed milk chocolate fudge easy to remove from the pan. You’ll love the clean, sharp edges it gives your dessert.
- Easy Cleanup: Just lift the paper out for quick washing.
- Perfect Presentation: Parchment makes your squares look professional.
- No Sticking: You won’t struggle with stuck fudge.
Necessary Tools for Smooth Mixing
Right tools are essential for the perfect texture. A good silicone spatula helps mix without air. Also, have heat-safe bowls ready for chocolate and mix-ins.
Using the right tools makes making quick condensed milk chocolate fudge rewarding. When your tools are ready, you can focus on creating a delicious treat.
Step-by-Step Chocolate Fudge Recipe with Condensed Milk
You’re about to learn how to make a delicious dessert from simple ingredients. A chocolate fudge recipe with condensed milk makes your time in the kitchen worth it. Follow these steps for a top-notch result every time.
Melting the Chocolate and Condensed Milk Base
Start by mixing your chocolate and sweetened condensed milk in a safe bowl. You can melt them in two ways:
- Stovetop Method: Use a double boiler on low heat. Stir constantly to avoid burning.
- Microwave Method: Heat in 30-second increments in the microwave. Stir well after each heating until smooth.
Achieving the Perfect Consistency
The best chocolate fudge recipe needs the right consistency. It should be thick but pourable, coating the spoon. If it’s too thin, heat a bit more but watch closely.
Don’t overheat, as it can mess up the texture. When the chocolate is fully melted and the mix looks shiny, stop heating. This ensures your quick condensed milk chocolate fudge sets well once cooled.
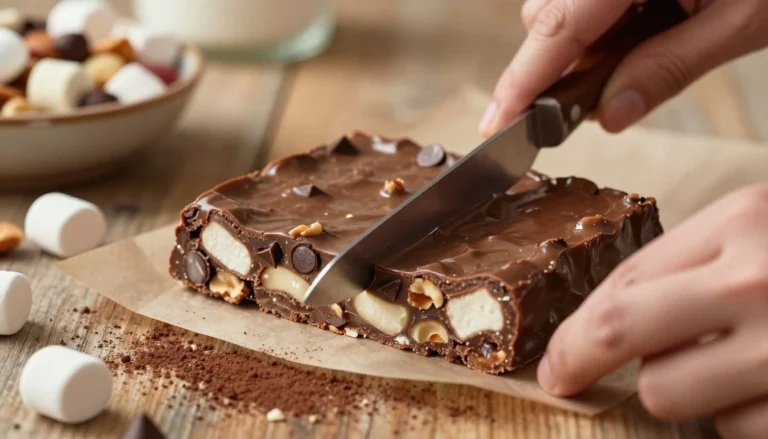
Folding in Your Chosen Mix-ins
After your base is smooth, it’s time to add your favorite mix-ins. Choose from nuts, dried fruits, or chocolate chips. Adding them correctly is key.
- Let the mix cool for about a minute.
- Fold in your ingredients gently with a silicone spatula.
- Pour into your pan before it hardens.
Don’t over-mix here. You want to keep your add-ins intact. A light touch ensures every piece of fudge is full of flavor and texture.
Techniques for Achieving a Silky Smooth Texture
Making perfect fudge is more about skill than luck. It’s about how you handle heat and movement. When you want creamy condensed milk fudge, keeping the mixture stable is key.
Managing Heat to Prevent Seizing
Too much heat is a common mistake in candy making. If it gets too hot, the chocolate’s cocoa butter can separate. This makes the fudge dry and crumbly.
Use low to medium-low heat to keep the temperature steady. Gentle heat helps your creamy condensed milk fudge stay smooth.
The Art of Proper Stirring
Stirring well is crucial for a smooth finish. Stir your mixture constantly to spread heat evenly.
This prevents hot spots that can burn your ingredients. Steady, rhythmic stirring ensures the condensed milk mixes well. This makes the fudge feel luxurious.
Cooling Methods for Optimal Crystallization
Cooling is key for the final texture. Letting the fudge cool slowly at room temperature helps form small sugar crystals.
These small crystals make the creamy condensed milk fudge melt well. Don’t cool it too fast by putting it in the freezer. Fast cooling can make it grainy.
| Heat Level | Stirring Speed | Resulting Texture |
|---|---|---|
| Low | Constant | Silky and smooth |
| Medium | Occasional | Slightly grainy |
| High | None | Dry and crumbly |
Troubleshooting Common Fudge Making Issues
Even the most experienced cooks sometimes face problems when making sweets. When working with condensed milk fudge, small mistakes in temperature or timing can affect the outcome. Luckily, most common issues are easy to spot and fix with a few simple steps.

Fixing Grainy or Gritty Fudge
A grainy texture often comes from sugar crystals forming too fast during cooling. If your mix feels sandy, it means the sugar didn’t dissolve fully or the mix was stirred too soon. Patience is your best tool for achieving a smooth finish.
To fix grainy fudge, gently reheat it with a bit of extra liquid like cream or more condensed milk. Stir slowly over low heat until it becomes smooth again. Avoid overheating, as it can make the texture worse.
What to Do If Your Fudge Won’t Set
If your condensed milk fudge stays soft or sticky, it might be due to wrong ingredient ratios or not enough cooling time. Sometimes, it just needs more time in a cool, dry place to set. Before giving up, try putting it in the fridge for two more hours.
“Success is not final, failure is not fatal: it is the courage to continue that counts.”
— Winston Churchill
If it still won’t set, you might have added too much liquid or not enough chocolate. You can use this soft mix as a rich sauce for ice cream or as a brownie filling. Don’t let a soft batch stop you from trying again.
Correcting Overcooked or Hard Fudge
Overcooking can make your fudge brittle or crumbly. This happens when there’s too little moisture, causing fats to separate. If your condensed milk fudge is too hard to cut, warm it slightly in the microwave to soften the edges.
To avoid this in the future, monitor your heat closely and use a heavy-bottomed pan. If it’s already too hard, here are some quick fixes:
- Add a teaspoon of warm water or milk to rehydrate the mix.
- Gently stir in a small amount of softened butter to add creaminess.
- Break the hard pieces into chunks and fold them into a fresh batch of melted chocolate.
Creative Variations for Your Homemade Fudge
Turning your chocolate fudge into a gourmet treat is simple. Once you know the basics, you can experiment with many flavors. You can change your dessert to match any season or taste.
Adding Nuts and Dried Fruits
Adding different textures makes your fudge better. Crunchy nuts like toasted walnuts or pecans add a nice crunch. Toasting your nuts first brings out their flavor.
Dried fruits like cranberries or cherries add a chewy texture. They also add a delightful tartness that balances the sweetness. Make sure to chop your fruits small so every bite has the right mix of flavors.
Infusing Flavors with Extracts and Spices
You can also add sophisticated flavors with extracts and spices. Peppermint extract makes a refreshing holiday treat. A teaspoon of instant espresso powder makes the chocolate deeper.
When using extracts, add them at the end to keep their flavor. Start with a small amount and taste as you go. This way, your fudge stays balanced and delicious.
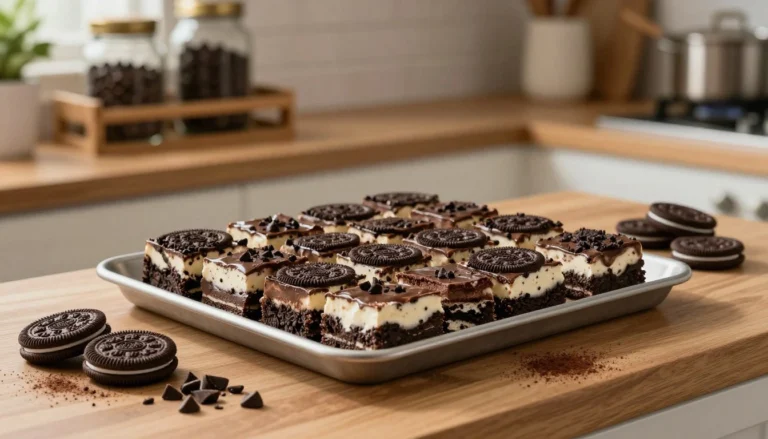
Creating Swirled or Layered Designs
Visual appeal is key when you want to wow your guests. Swirl contrasting flavors like peanut butter or white chocolate into your fudge. Use a knife or skewer to create a marble effect.
For a layered look, pour two different fudge batches into your pan. Let the first layer set a bit before adding the second. This creates a visually striking masterpiece.
| Base Flavor | Add-in Option | Flavor Profile |
|---|---|---|
| Dark Chocolate | Dried Cherries | Rich and Tart |
| Milk Chocolate | Toasted Pecans | Sweet and Nutty |
| White Chocolate | Peppermint Extract | Cool and Refreshing |
| Dark Chocolate | Espresso Powder | Bold and Robust |
Storing and Preserving Your Fudge
To keep your homemade fudge with condensed milk fresh, follow a few simple steps. These steps help your dessert stay creamy and rich, just like when you first made it.

Proper Room Temperature Storage
For quick enjoyment, store your fudge at room temperature. Use an airtight container to keep it moist and free from kitchen smells.
Store the container in a cool, dry place. Avoid direct sunlight or heat to prevent the fudge from getting too soft.
Refrigeration and Freezing Guidelines
For longer storage, the fridge is best. Store your fudge in an airtight container for up to two weeks without losing quality.
Freezing is great for even longer storage. Your fudge can stay fresh for up to three months in the freezer.
Wrap each piece in plastic wrap or parchment paper before freezing. This step prevents freezer burn and keeps your homemade fudge with condensed milk tasting great.
How to Package Fudge for Gifting
When giving your fudge away, how you present it matters. Use decorative tins or sturdy boxes lined with parchment paper to keep the fudge secure.
Add a ribbon or a personalized tag to make your gift look special. Make sure the fudge is set and chilled before packaging to avoid sticking.
Serving Suggestions for Decadent Treats
Creating a memorable treat is more than just a recipe. It’s about how you serve it. A decadent chocolate fudge recipe shines when you focus on presentation. This turns a simple dessert into a showstopper.
Pairing Fudge with Beverages
Fudge is rich, so picking the right drink is key. A dark roast coffee cuts through the sweetness with its bitterness. Whole milk is a classic choice, offering a creamy contrast. For tea lovers, unsweetened black tea or spicy chai brings out the chocolate flavors in your decadent chocolate fudge recipe.
| Beverage Type | Flavor Profile | Why It Works |
|---|---|---|
| Dark Roast Coffee | Bitter & Robust | Balances intense sugar |
| Whole Milk | Creamy & Neutral | Enhances smooth texture |
| Black Tea | Tannic & Earthy | Cleanses the palate |
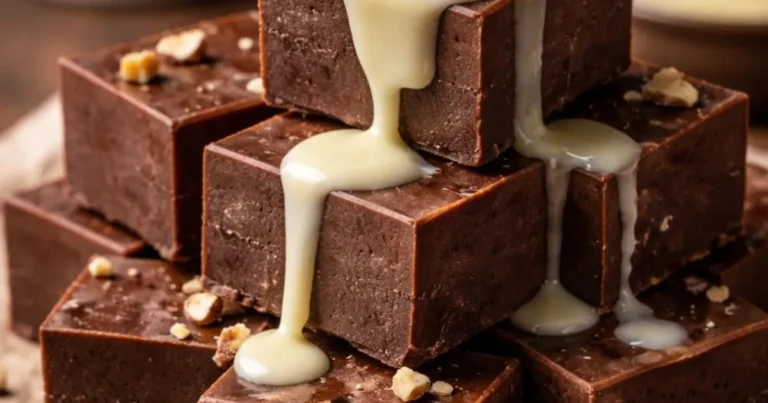
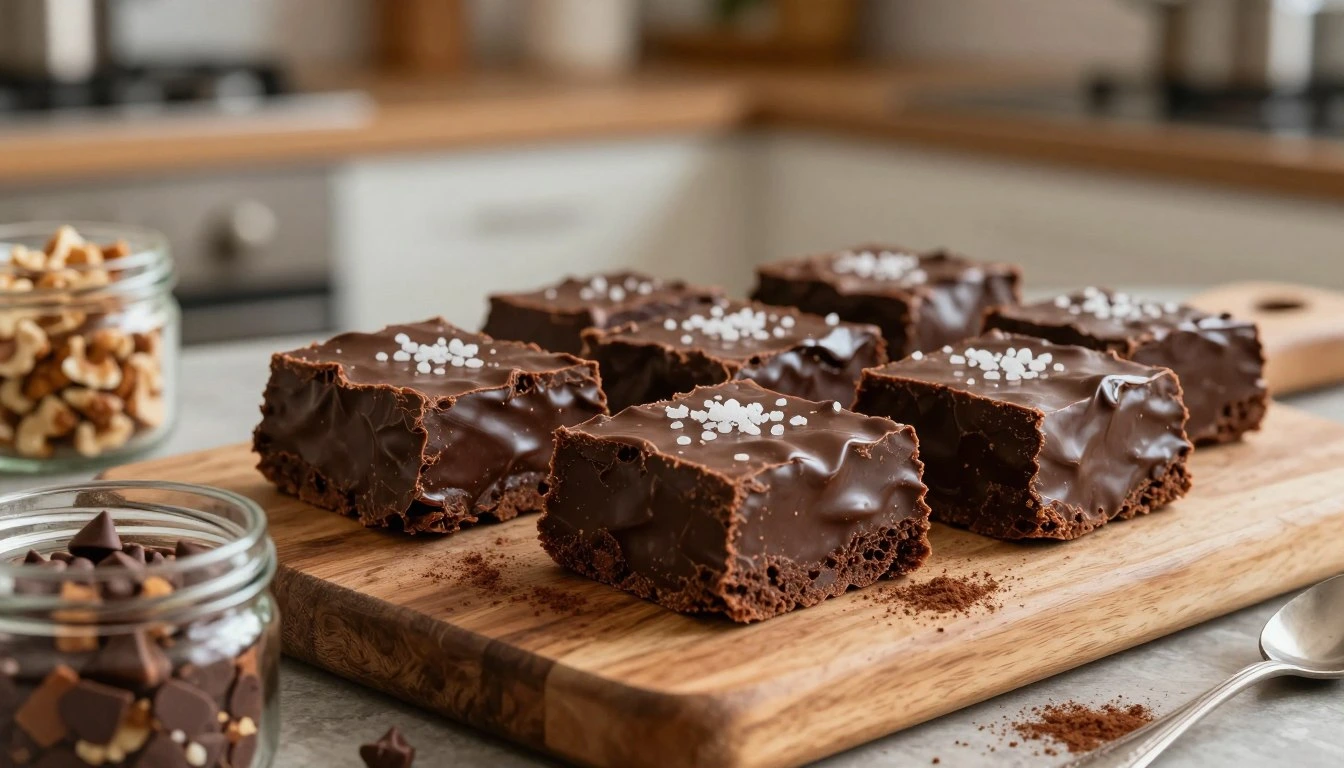
Cutting Perfect Squares Every Time
Getting clean edges on your fudge can be tricky. The trick is to heat your knife under hot running water before cutting. Dry the knife with a cloth and press down firmly to get smooth squares.
“The true joy of a homemade sweet lies not just in the making, but in the art of sharing it with those you love.”
— Anonymous
Presenting Fudge for Special Occasions
For parties or gifts, how you present your fudge matters a lot. Use a tiered platter with parchment or lace for a pretty look. Wrap each piece in gold foil or put them in clear boxes with a ribbon for a luxurious touch.
Conclusion
Making sweets at home is incredibly rewarding. It’s something store-bought treats can’t offer. With this simple fudge recipe, you can make delicious fudge whenever you want.
You can now turn simple ingredients into a rich, chocolatey fudge that’s as good as any candy shop. Knowing how to use condensed milk and choosing quality ingredients lets you try new flavors.
Starting your candy-making journey means endless possibilities. You can add your favorite nuts, extracts, or spices to make each batch special. It’s perfect for any event.
We hope you’ll share your homemade sweets with loved ones. It’s a great way to spread happiness. Keep improving your skills and find your own unique way of making treats.
## FAQ
### Q: What makes this the best chocolate fudge recipe for home cooks?
A: The secret to the best chocolate fudge recipe is using high-quality ingredients. Eagle Brand Sweetened Condensed Milk adds stability. Premium chocolate, like Ghirardelli 60% Cacao Bittersweet Baking Bars, gives a superior melt and flavor.
### Q: How do I ensure my creamy condensed milk fudge remains silky smooth?
A: To get a creamy fudge, manage your heat carefully. Use a heavy-bottomed All-Clad saucepan for even heat. Adding Land O’Lakes Unsalted Butter gives a luxurious finish and prevents graininess.
### Q: Why should I choose a chocolate fudge recipe with condensed milk over traditional methods?
A: This recipe is more reliable than traditional ones. It uses condensed milk as a pre-emulsified base. This makes the fudge set perfectly every time, without needing a candy thermometer.
### Q: Can I use different types of chocolate in this simple fudge recipe?
A: Yes, you can use different chocolates. Try Baker’s Semi-Sweet Chocolate or white chocolate. Darker chocolates make a firmer fudge, while milk chocolate makes it softer.
### Q: What is the best way to store a decadent chocolate fudge recipe to keep it fresh?
A: Store your fudge in an airtight container to keep it fresh. It stays good at room temperature for up to two weeks. Refrigerate it to extend shelf life. For freezing, wrap it tightly in Glad Press’n Seal for up to three months.
### Q: How do I get clean, professional edges when cutting my condensed milk fudge?
A: For clean edges, line your pan with Reynolds Kitchens Parchment Paper. Lift the fudge out of the pan once set. Use a sharp knife heated under hot water to cut clean squares.
### Q: What should I do if my easy chocolate fudge recipe turns out too soft?
A: If your fudge is too soft, it might not have cooled enough or have too much liquid. Try refrigerating it for several hours or re-melt it and add more melted Ghirardelli chocolate to firm it up.