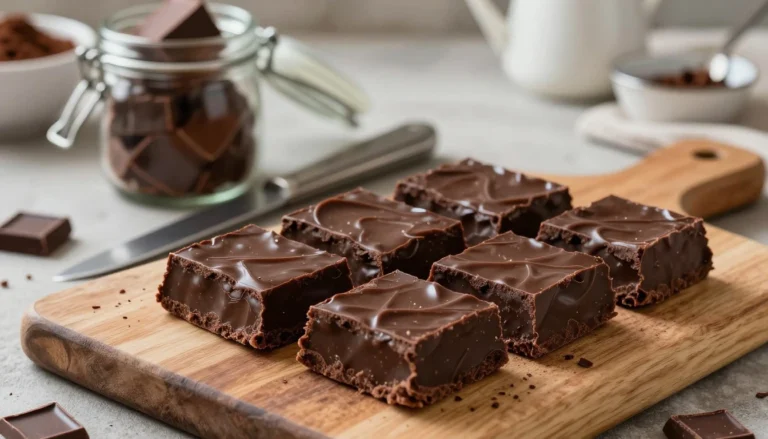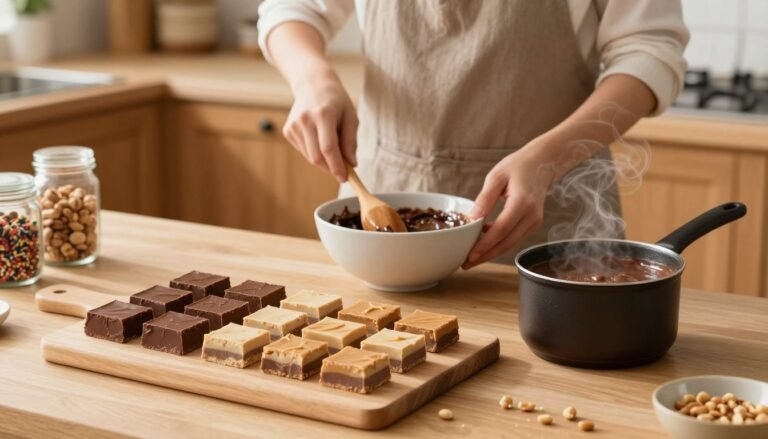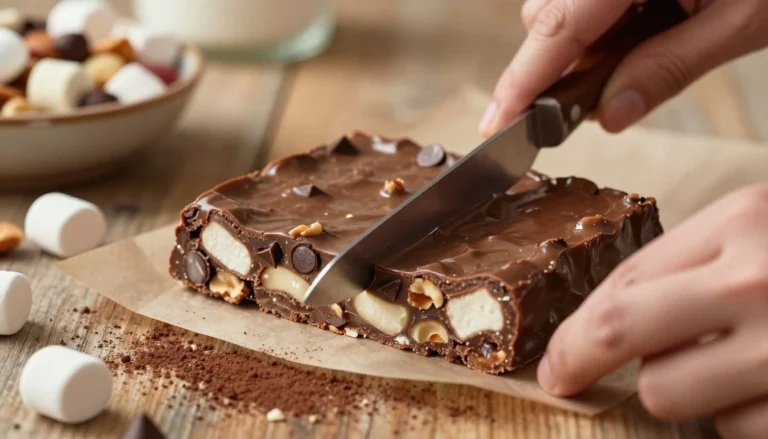
What Is the Traditional Method for Old Fashioned Fudge recipe ?
The smell of fudge cooking on the stove is magical. You might remember watching a parent or grandparent make it. This memory connects you to your family’s past.
The traditional fudge recipe is different from today’s quick versions. It doesn’t use marshmallow creme or condensed milk. Instead, it uses basic ingredients heated to a precise temperature. This method requires your full attention and patience.
Learning to make old fashioned fudge teaches you candy making science. Heating sugar, milk, and butter together controls sugar crystals. The soft ball stage at 234°F is key for creamy fudge. Stirring and cooling correctly are just as important as your ingredients.
Making traditional fudge from scratch is a lasting skill. You’ll see why homemade fudge tastes better than store-bought. It’s a way to connect with your family’s cooking traditions.
Key Takeaways
- Traditional fudge requires heating ingredients to the soft ball stage at 234°F for proper texture
- Old fashioned fudge recipe methods avoid modern shortcuts like marshmallow creme or condensed milk
- Proper stirring technique and temperature control create creamy rather than grainy results
- The soft ball stage test using cold water helps you know when your mixture is ready
- Beating the fudge mixture at the right cooling point determines its final consistency
- Traditional recipes produce superior flavor and texture compared to modern convenience versions
The Rich Heritage of Traditional Fudge Making
Fudge-making has a long history that spans centuries and continents. It’s more than just cooking; it’s a tradition passed down through generations. Each cook adds their own twist, making it special.
The history of fudge shows how different places and cultures shaped it. In Scotland, for example, unique methods were developed. These methods focus on quality ingredients and precise temperatures for the perfect fudge.
Scottish Fudge and Tablet Traditions
Scotland is famous for its fudge and tablet making. Fudge is smooth and creamy, while tablet is firmer and grainier. This difference comes from how they’re made.
Gardiners of Scotland is a top name in this craft. They make luxury fudge using old methods and high standards. Knowing the difference between fudge and tablet is key to making them right.
| Confection Type | Texture | Cooking Method | Ingredient Focus |
|---|---|---|---|
| Scottish Fudge | Smooth and creamy | Careful simmering with constant attention | Quality chocolate, butter, and evaporated milk |
| Scottish Tablet | Firm and grainy | Rapid cooking to higher temperatures | Condensed milk and granulated sugar |
How Old Fashioned Fudge Became a Family Staple
A grandmother’s fudge recipe is often at the heart of family traditions. Your family might have a special fudge recipe that brings back memories. These recipes are more than just food; they’re family heirlooms.
Fudge-making was a way for families to come together. Whether it was Aunt Barbara’s secret or Nana’s special touch, these recipes were a big part of family gatherings. The act of making fudge was just as important as the fudge itself.
- Family recipes passed down through multiple generations
- Each cook adding personal touches and unique ingredients
- Holiday celebrations centered around fudge-making traditions
- Recipes becoming markers of family identity and pride
- Shared kitchen time building lasting memories and bonds
Starting to make fudge might be your way to connect with your family’s past. It’s a way to keep traditions alive and make new memories. You’re part of a long line of cooks who know the power of homemade candy.
Understanding the Classic Old Fashioned Fudge Recipe
Making classic homemade fudge connects you to a long-standing candy tradition. It’s all about using quality ingredients and the right techniques. This is what makes your fudge special.
A true old fashioned fudge recipe has four key parts. These parts are what make the fudge creamy and delicious. They are the same in every recipe, no matter where it comes from.
- Granulated sugar as your sweetening base
- Milk or evaporated milk for creaminess
- Butter for richness and texture
- Chocolate or unsweetened cocoa for flavor
- Vanilla extract for depth
There are two main ways to make traditional fudge. The first uses marshmallows to make it easier. The second method is more traditional, using only cocoa, sugar, and beating.
| Fudge Style | Key Ingredient | Texture Result | Difficulty Level |
|---|---|---|---|
| Marshmallow-Based | Marshmallow creme | Very creamy and soft | Easier |
| Pure Cocoa | Unsweetened cocoa powder | Dense and rich | Requires precision |
| Chocolate Chip | Chocolate chips | Smooth with slight texture | Moderate |
The essence of classic homemade fudge is in the making, not just the recipe. It’s about heating the mixture to the soft ball stage. This creates the perfect texture.
Knowing what makes fudge “old fashioned” means valuing traditional cooking methods. These methods focus on technique over quick fixes. This results in better taste and texture than modern shortcuts.
Over time, different regions and families have added their own twists. But they all keep the core elements and methods the same. This is what makes your favorite recipe unique.
Essential Ingredients for Authentic Homemade Fudge
Making simple fudge from scratch starts with picking the right ingredients. Each ingredient is key to making your fudge creamy and tasty or grainy and not so good. Knowing what each ingredient does helps you make better choices and get great results at home.
The base of any simple fudge recipe includes these main ingredients:
- 3/4 cup unsalted butter
- 6 ounces evaporated milk
- 3 cups sugar
- 1 2/3 cups semi-sweet chocolate chips or 3/4 cup unsweetened cocoa powder
- 1 teaspoon vanilla extract
Why Quality Chocolate Matters
Chocolate quality is crucial for your fudge. Cheap chocolate has fillers that make fudge grainy. For smooth, creamy fudge, use premium semi-sweet chocolate chips or cocoa powder. Good chocolate melts well and adds deep flavor.
The Role of Evaporated Milk and Butter
Evaporated milk adds rich dairy flavor and proteins for creaminess. Use unsalted butter to control salt levels. The butter’s fat makes the fudge melt in your mouth. If you don’t have evaporated milk, whole milk works but needs careful heat control. Sweetened condensed milk adds sweetness and richness, speeding up cooking time. These dairy ingredients are essential for a great simple fudge recipe from scratch.
| Milk Option | Amount | Best For | Special Notes |
|---|---|---|---|
| Evaporated Milk | 6 ounces | Traditional, creamy fudge | Concentrated flavor, ideal for simple fudge recipe from scratch |
| Whole Milk | 1 1/2 cups | Lighter texture fudge | Requires careful temperature monitoring |
| Sweetened Condensed Milk | 397g tin | Faster cooking time | Adds sweetness and dairy richness |
The Traditional Fudge-Making Process Step by Step
Making old time fudge is a detailed process. Each step is crucial and can’t be skipped or rushed. It’s important to understand each stage to make smooth, delicious fudge every time. Let’s go through the traditional method from start to finish.
Your journey starts with proper pan preparation. Butter your pan well or use parchment paper. This step prevents the fudge from sticking and makes it easier to remove. Place your prepared pan in a cool spot before cooking.
Begin by melting butter in a saucepan over low heat. This gentle heat prevents scorching and ensures even melting. After melting, add your milk and sugar to the pan.
The sugar dissolution stage is critical. Stir often for about five minutes until the sugar dissolves completely. Undissolved crystals can cause a grainy texture. You need a smooth mixture before moving on.
Then, increase your heat to medium and bring the mixture to a rolling boil. Stir constantly for four minutes. This step develops the right texture and prevents burning.
After boiling, remove the pan from heat right away. Add your chocolate and marshmallows if using them. Stir until smooth—about two minutes. Then, add vanilla extract and stir for one more minute until fully blended.
- Pour mixture into your prepared pan
- Allow fudge to set for forty-five minutes to one hour
- Keep the pan at room temperature during setting
- Cut into squares when fully set
Being patient during the setting stage is key. It ensures your fudge is perfect for slicing. Rushing this step can ruin all your hard work.
Mastering the Soft Ball Stage for Perfect Texture
The soft ball stage is key in making homemade fudge. It’s when your sugar mix reaches the perfect temperature and consistency. Getting it right makes your fudge smooth and creamy, not grainy and hard.
When you cook sugar, water evaporates slowly. This changes the mix’s behavior and feel. At soft ball stage, sugar molecules form tiny crystals. These crystals give your fudge its smooth texture. The ideal temperature range is 234°F to 240°F, with 234°F being the softest.
Knowing when you’ve reached the perfect stage takes practice. It’s crucial for making your fudge just right. You can test your fudge in two ways.
Testing Your Fudge with the Cold Water Method
The cold water method is a traditional way to test fudge. It’s been used for generations. Here’s how it works:
- Fill a small glass or bowl with very cold water
- Drop a small spoonful of your hot fudge mixture into the water
- Wait a few seconds for it to cool completely
- Remove the cooled piece and roll it between your fingers
- At soft ball stage, it should form a soft ball that flattens when you press it
The texture should feel like clay or playdough. It should hold its shape but flatten under gentle pressure. If it’s too soft or too hard, adjust your cooking time.
Using a Candy Thermometer for Precision
A candy thermometer gives you exact temperature readings. It makes your fudge-making process more precise. Using one correctly ensures consistent results every time.
| Thermometer Placement | What to Do | Why It Matters |
|---|---|---|
| Bulb Position | Keep the bulb from touching the pan bottom | Contact with hot metal gives false high readings |
| Reading Angle | Read the temperature at eye level | Viewing from above or below creates reading errors |
| Pre-Testing | Test your thermometer in boiling water first | It should read 212°F at sea level for accuracy |
Before making your fudge, check your thermometer’s accuracy. Boil water and place the thermometer in it. At sea level, it should read exactly 212°F. If it’s off, adjust your target temperature.
Insert your thermometer once your mixture starts boiling. Watch it carefully as the temperature climbs toward 234°F. Your fudge is ready when the thermometer hits this sweet spot. Remove the pan from heat immediately when you reach this temperature.
Common Mistakes That Lead to Grainy Fudge
Making smooth fudge needs careful attention. Grainy fudge is a common problem. It ruins the silky texture you expect.
Graininess comes from sugar crystals growing too big. In an old fashioned fudge recipe, sugar must cool down right. This prevents a sandy feel and gives you the creamy texture you want.
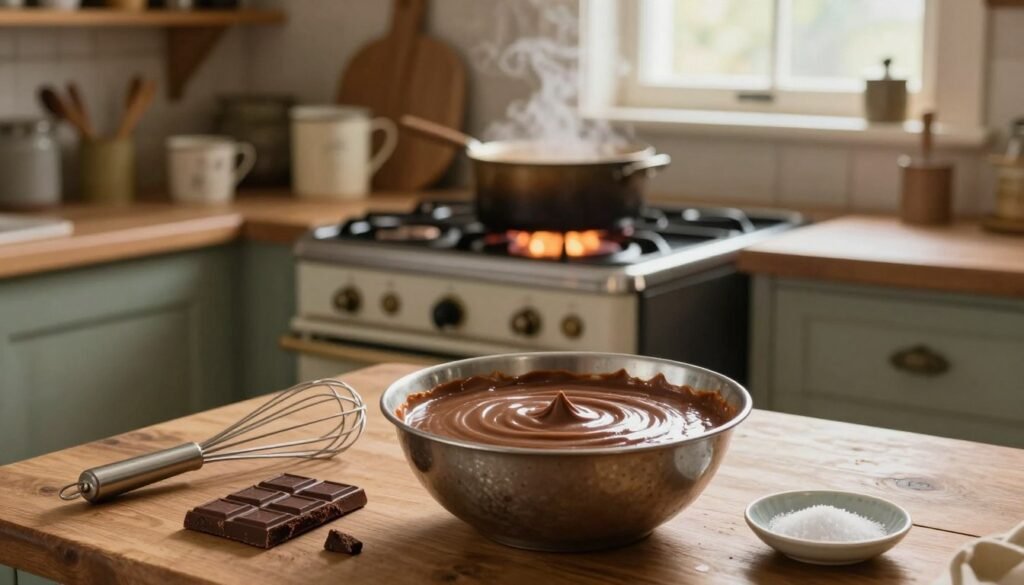
- Heating ingredients too quickly over high heat causes uneven cooking and encourages large crystal formation
- Failing to dissolve sugar completely before reaching a rolling boil creates seed crystals that trigger unwanted crystallization throughout your batch
- Using low-quality chocolate with fillers and stabilizers interferes with proper crystal structure development
- Stirring at the wrong times introduces seed crystals when you should be waiting, or forgetting to stir when constant mixing prevents scorching
- Poor temperature control, cooking beyond the soft ball stage or not reaching it at all, ruins the final texture
Temperature control is key when making fudge. Even one undissolved sugar grain can start a chain reaction. Too much heat can also cause the sugars to concentrate unevenly.
If you notice graininess, you might be able to fix it. Reheat it gently with a bit of water and start cooling again. But prevention is easier. Use medium heat, make sure sugar dissolves fully, and choose quality ingredients for smooth fudge.
The Importance of Stirring and Temperature Control
Getting the right temperature and stirring technique is key when making creamy chocolate fudge. These factors decide if your fudge is smooth and creamy or grainy and disappointing. Knowing how heat and stirring work together is crucial for making great fudge at home.
The heat you use affects how sugar dissolves and how evenly your mixture cooks. High heat can make the bottom of your pan hotter than the top. This can scorch your mixture and cause uneven cooking. Your fudge needs gentle, consistent heat to cook properly.
Why Medium Heat Produces Creamier Results
Medium heat is best for making fudge. It has enough energy to dissolve sugar and reduce moisture without causing temperature problems. Gentle, steady bubbling means your heat is just right. Rapid, violent bubbling means you need to lower the flame.
At medium heat, sugar dissolves evenly in your mixture. This prevents the grainy texture that comes from fast cooking. The slow cooking allows water to evaporate at the right pace, concentrating your ingredients without burning them.
Your stirring pattern changes with the cooking stage. Stir frequently at first to help sugar dissolve and distribute heat evenly. When boiling, stir constantly for about four minutes to prevent scorching on the bottom.
Some recipes tell you not to stir during certain phases, like when cooking to the soft ball stage. Stirring at these moments can introduce seed crystals that cause early crystallization, leading to graininess. Always follow your recipe’s directions carefully at each stage.
| Cooking Stage | Heat Level | Stirring Instructions | Expected Result |
|---|---|---|---|
| Initial Heating | Medium Heat | Stir Frequently | Even Sugar Dissolution |
| Boiling Phase | Medium Heat | Constant Stirring (4 minutes) | Smooth Mixture, No Scorching |
| Soft Ball Stage | Medium Heat | Do Not Stir | Proper Temperature Reached |
| After Cooling | Room Temperature | Gentle Stirring | Creamy Texture Development |
Master these techniques, and you’ll make creamy chocolate fudge that wows everyone. Paying attention to heat and stirring is what makes your homemade fudge stand out. It’s the difference between fudge that impresses and fudge that disappoints.
Aunt Barbara's Easy Twenty-Minute Fudge Method
Want to make fudge quickly without spending hours? Aunt Barbara’s twenty-minute method is perfect. It combines old-school techniques with modern shortcuts for great results. This creamy chocolate fudge recipe is a family favorite passed down through generations.
This method uses mini marshmallows as a secret ingredient. Marshmallows have gelatin and extra sugar that help your fudge set right. Even if you’re new to candy-making, you’ll get great results with this easy method. The mini marshmallows melt fast, making the fudge silky smooth.
- 3/4 cup unsalted butter
- 6 ounces evaporated milk
- 3 cups sugar
- 1 2/3 cups semi-sweet chocolate chips
- 10 ounces mini marshmallows
- 1 teaspoon vanilla extract
The steps are easy to follow. Start by buttering your pan. Then, melt butter over low heat. Add milk and sugar, stirring until they dissolve in about five minutes.
Next, increase the heat to medium and stir constantly for four minutes until it boils. Remove from heat and stir in chocolate chips and marshmallows for two minutes. Add vanilla and stir for one more minute. Pour into your pan and let it set for forty-five minutes.
Many home cooks love this recipe for its simplicity. Even those who don’t bake often can make it look like a pro. The trick is to boil it right before stirring and work fast after removing it from heat.
Pure Cocoa Fudge Without Marshmallow Creme
Creating authentic retro fudge candy means going back to the old days. Back then, fudge makers used simple, pure ingredients and skill. This recipe skips marshmallow creme and condensed milk for unsweetened cocoa powder, sugar, milk, and butter. The result is fudge with a rich, deep chocolate flavor that modern shortcuts can’t match.
This traditional method takes more time and effort. But the reward is fudge that tastes like your grandmother’s. You’ll learn about temperatures, timing, and beating techniques to make creamy candy.
Creating Fudge from Scratch with Unsweetened Cocoa
Starting your vintage fudge recipe begins with quality unsweetened cocoa powder. You’ll need these key ingredients:
- 3/4 cup Hershey’s unsweetened cocoa powder
- 3 cups granulated sugar
- 1/2 teaspoon salt
- 1 1/2 cups whole milk
- 1/4 cup unsalted butter
- 1 teaspoon vanilla extract
- Optional nuts of your choice
First, line your pan with parchment paper. Mix the cocoa, sugar, and salt in a heavy-bottomed pot. Add the milk and stir constantly over medium heat for about five minutes. Once boiling starts, stop stirring and cook until it reaches 234°F.
Then, put your pot in a sink with cold water (about two inches deep). This stops the cooking. Add the butter and vanilla without stirring. Let it cool to room temperature completely.
The Beating Technique for Satiny Sheen
The beating process is key to making real retro fudge candy. Use a wooden spoon to beat the cooled mixture vigorously. Look for the change from glossy to satiny sheen. This shows sugar crystals are forming at the right size.
Beating will tire your arm. Beat for thirty seconds, rest for thirty seconds, then repeat. The change from shiny to matte finish happens slowly. When you see the satiny sheen, add nuts if using and spread the fudge on the pan. It sets quickly after that.
“True fudge comes from patience and proper technique, not convenience ingredients.”
This authentic vintage fudge recipe is worth the effort. It offers superior flavor depth and the joy of mastering traditional candy-making.
Old Fashioned Summer Fudge Recipes for Seasonal Celebrations
Summer adds a special charm to hosting at home. Your old fashioned fudge recipe shines at warm-weather parties. Unlike many chocolate treats, traditional fudge stays firm at room temperature. It’s perfect for outdoor events like garden parties, weddings, and Fourth of July picnics.
An old fashioned fudge recipe is versatile for summer fun. Serve it with vanilla ice cream for a cool dessert on hot days. Pair it with fresh summer berries like strawberries and raspberries for a stunning flavor contrast. This delight your guests and highlights seasonal ingredients.
How you present your fudge matters for summer events. Cut it into small pieces for easy serving. Wrap individual pieces in wax paper for thoughtful wedding favors. Arrange fudge on platters with fresh fruit and cookies for a beautiful display.
For adult gatherings, add a twist to your old fashioned fudge recipe. Pair it with whisky or bourbon for a unique taste after dinner. Floral iced teas like lavender and hibiscus also complement chocolate’s richness. You can even use fudge as a garnish for summer cocktails.
| Summer Pairing Ideas | Best Serving Method | Perfect for Event |
|---|---|---|
| Vanilla ice cream | Crumbled on top or melted as sauce | Casual garden gatherings |
| Fresh berries | Arranged on serving platters | Elegant outdoor brunches |
| Whisky or bourbon | Small squares with spirits | Adult evening celebrations |
| Floral iced teas | Fudge pieces beside beverages | Summer tea parties |
| Cocktails | Crumbled garnish or cube decoration | Outdoor entertaining events |
Proper storage keeps your fudge fresh for summer events. Store it in shaded areas to prevent softening. Keep it in an airtight container at room temperature for up to two weeks. Your homemade fudge stays delicious and looks great for all your seasonal gatherings.
- Cut fudge into small pieces for easy serving at picnics
- Wrap individual pieces for beautiful wedding favors
- Pair with fresh summer fruit for elegant presentations
- Serve alongside iced teas and refreshing beverages
- Keep in shaded areas during outdoor events
Your old fashioned fudge recipe makes summer entertaining unforgettable. This timeless treat adds comfort and sophistication to every warm-weather celebration. It’s perfect for both intimate backyard gatherings and formal garden weddings.
How Scottish Craftsmen Perfect Luxury Fudge
Scottish fudge makers have mastered the art of making luxurious treats over centuries. They use refined techniques and focus on quality. When you look at a traditional Scottish fudge recipe, you see how simple ingredients become exceptional. Craftsmen like those at Gardiners of Scotland make fudge an art by sticking to old ways and using the best ingredients.
The secret to Scottish luxury fudge is in the methods used. The best recipes use whole milk and sweetened condensed milk. This mix gives Scottish fudge its unique richness and depth. The use of condensed milk became popular in Scotland during the Victorian era, thanks to canned goods.
Scottish craftsmen use slow heating to make their fudge. This slow process caramelizes sugars, adding complexity. The mixture changes color from white to caramel, showing it’s ready.
Knowing what makes fudge luxurious helps you see the Scottish way. The right ingredients are key:
- Real butter instead of substitutes
- Premium quality cocoa or chocolate
- Fresh whole milk and condensed milk
- Unsalted butter for flavor control
Scottish fudge holds a special place in the nation’s food culture. Recipes are treasured family traditions and cultural symbols. They’re enjoyed at celebrations, given as gifts, and sold in shops across Scotland.
Scottish fudge differs from American versions. It’s richer, softer, and often has local flavors. These reflect the tastes and preferences of the region.
The beating technique is key in making traditional fudge. You need to beat the mixture until it looks satiny. This step is what makes Scottish fudge creamy. The time and effort put into traditional methods make the difference between luxury fudge and regular candy.
Learning from Scottish craftsmen shows that quality methods are as important as ingredients. Handcrafting in small batches produces better results than mass production. Appreciating Scottish fudge-making traditions grows when you see the real differences in how it’s made.
Storing and Serving Your Homemade Fudge
After making your classic homemade fudge, it’s important to store it right. This way, you can enjoy it for weeks. The storage and serving methods greatly affect its taste and texture.
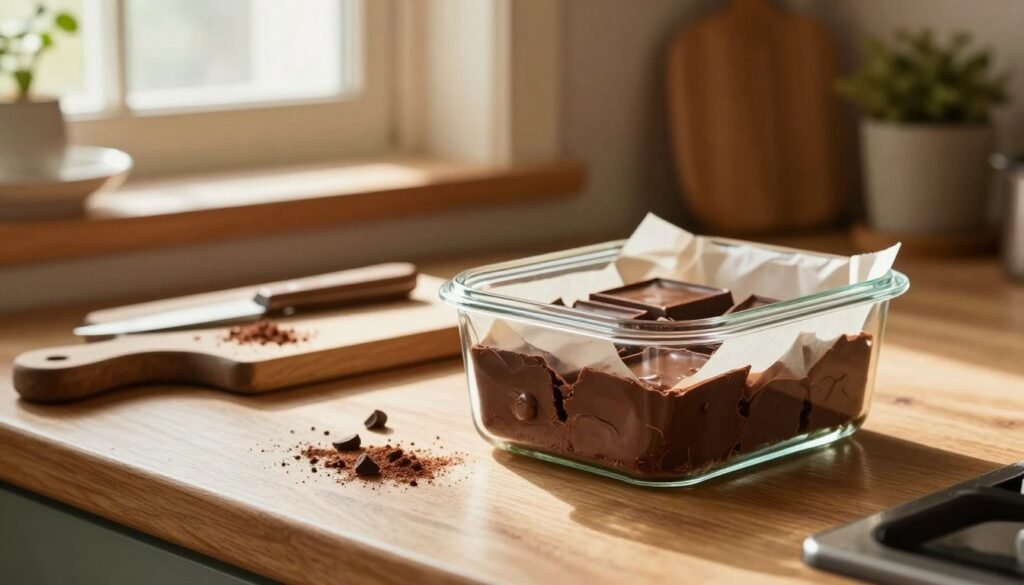
Let your fudge cool completely before cutting. It should sit on the countertop for 45 minutes to 1 hour. This step is crucial for the right texture and clean cuts. Skipping it can result in messy, crumbly pieces.
Best Practices for Room Temperature Storage
Storing your fudge at room temperature is best. Keep it away from sunlight and heat. The ideal temperature is between 65 and 70 degrees Fahrenheit. Avoid refrigerating it, as cold temperatures make it hard and can cause moisture issues.
Use an airtight container for storage. Candy tins are great for this. Place wax paper or parchment between layers to prevent sticking. This keeps your fudge fresh and easy to serve.
| Storage Method | Duration | Best Results | Temperature Range |
|---|---|---|---|
| Airtight Container at Room Temperature | Up to 3 weeks | First week is optimal | 65-70°F |
| Glass Container with Lid | Up to 3 weeks | Maintains flavor well | 65-70°F |
| Candy Tin with Wax Paper Layers | Up to 3 weeks | Protects from odors | 65-70°F |
| Refrigerated Storage | 1-2 weeks | Texture becomes firm | Below 40°F |
Your fudge stays fresh longest in the first week. After that, it gradually loses texture and flavor. Still, it remains good for up to three weeks when stored correctly.
When serving, cut your fudge into small 1-inch squares. Use a sharp knife warmed under hot water for clean cuts. Dry the knife between cuts to prevent dragging.
- Store in airtight containers away from light
- Maintain room temperature between 65-70°F
- Layer pieces with wax paper to prevent sticking
- Serve within the first week for best flavor
- Never refrigerate unless absolutely necessary
Presentation is key when serving your homemade fudge. Arrange it on decorative plates for special occasions. Package pieces in clear cellophane bags tied with ribbon for beautiful gifts. Display squares in vintage candy dishes for a nostalgic appeal that guests will remember.
Variations and Add-Ins for Traditional Fudge
An old time fudge recipe is a great base for endless creativity. You can make your fudge unique by adding your favorite mix-ins and flavors. Making traditional fudge is all about being flexible. Once you learn the basics, making your own version is fun and easy.
There are many add-ins you can use to make your fudge better. Chopped walnuts or pecans add a nice crunch and flavor. Add about one-half cup of nuts just before putting the mixture in your pan. Dried fruits like cherries, cranberries, or apricots add chewiness and sweetness. They look great too. Add these after beating your fudge to the right consistency.
Flavor extracts can turn your fudge into seasonal treats. Use peppermint for holidays, almond for elegance, or orange for a citrus twist. Maple extract is great for autumn. Keep your add-ins between one-half and one cup per batch for the best results.
Different chocolates give your fudge unique tastes:
- Dark chocolate makes fudge intense and less sweet
- Semi-sweet chips offer balanced sweetness and richness
- Milk chocolate makes fudge creamier and sweeter
- Unsweetened cocoa gives pure chocolate flavor
Scottish traditions add a touch of class with spirits. A tablespoon of whisky makes your fudge special for adults. American Southern versions might use bourbon or rum. These spirits add depth without overpowering the chocolate.
Change only one thing at a time when trying new things. Keep track of what works and what doesn’t. This way, you can make your fudge even better and avoid mistakes. Your fudge will become a family favorite if you stick to traditional methods and ratios.
Why Grandmother's Fudge Recipe Still Matters Today
Your grandmother’s fudge recipe is more than just candy-making. It connects you to your family’s history and traditions. By making this recipe, you honor your ancestors and create new memories with your loved ones.
Every family has a special recipe that defines them. For many, it’s grandmother’s fudge. These recipes, with their butter and sugar stains, hold deep emotional value. They remind us of countless holiday seasons and moments in the kitchen.
The Nostalgia and Comfort of Vintage Recipes
A vintage fudge recipe offers something unique. Its creamy texture and rich chocolate smell bring back memories. The slow cooking process is calming, unlike today’s fast foods.
Making grandmother’s fudge is a way to remember her. By following her steps and using her pan, you honor her memory. You also start new traditions for your family.
| What Vintage Recipes Provide | Modern Alternatives |
|---|---|
| Family connection and heritage | Convenience and speed |
| Patience and skill development | Pre-made products |
| Genuine care and effort | Instant gratification |
| Sensory experience and memories | Consistent but impersonal results |
Your grandmother’s fudge recipe is not just about the past. It’s about keeping meaningful connections alive. In today’s fast world, making fudge offers real satisfaction. It shows you care about the people you love.
- Handwritten recipe cards carry generations of love and knowledge
- Vintage fudge recipes connect you to family identity
- The candy-making process creates meditation and peace
- Homemade fudge represents genuine effort and care
Maybe your grandmother learned to make fudge during tough times. Or maybe it came from a neighbor or church cookbook. Whatever its story, her fudge recipe is a piece of family history. By keeping these traditions alive, you honor your past and create new memories.
Conclusion
Making old fashioned fudge requires mastering several key steps. You must control the temperature to reach 234°F. Quality ingredients are essential, not shortcuts.
Stirring and beating techniques are crucial. Patience is the most important ingredient. These steps make homemade fudge stand out from store-bought candy.
There are many ways to make delicious fudge. Aunt Barbara’s method is quick and easy. The pure cocoa method is more challenging but rewarding.
Your choice depends on your skill level and time. Each method is rooted in tradition, passed down through generations.
Creating fudge is more than just making candy. It builds family traditions and teaches valuable skills. Every batch adds to the tradition of home candy-making.
Your fudge will be richer and creamier than store-bought. Start with a recipe that feels right for you. As you gain confidence, try new techniques.
You now have the skills to make delicious fudge that honors tradition. Your kitchen will fill with the scent of melting chocolate. Your loved ones will appreciate the difference quality makes.
FAQ
What exactly is the soft ball stage and why is it so important in traditional fudge making?
The soft ball stage is when sugar syrup reaches 234-240°F. At this point, it forms a pliable ball in cold water. This stage is key because it ensures the sugar molecules form the right crystals for a smooth texture.
It’s the moment when the syrup has enough moisture to stay soft and sliceable. If you miss this stage, your fudge won’t set right. Cooking too long makes it too firm and grainy.
How do I test for soft ball stage without a candy thermometer using the traditional cold water method?
The cold water method is a classic way to check for soft ball stage. Drop a bit of your fudge into cold water and wait a few seconds. Then, feel it between your fingers.
At soft ball stage, it should feel like clay or playdough. This method takes practice, but it’s reliable without any special equipment.
Why does my fudge turn out grainy instead of smooth and creamy?
Grainy fudge comes from improper sugar crystallization. This can happen if you heat too quickly or don’t dissolve sugar fully. Using chocolate with too many additives also causes problems.
Stirring at the wrong time and poor temperature control are other common mistakes. Even one undissolved sugar grain can start a chain reaction, making your fudge grainy.
What’s the difference between old fashioned fudge made with marshmallows versus pure cocoa fudge?
Marshmallow-based fudge, like Aunt Barbara’s, is easy and always turns out smooth. It’s great for beginners. Pure cocoa fudge, on the other hand, requires more skill but tastes richer.
Beating the cooled cocoa fudge mixture is crucial for its texture. This process makes it smooth and creamy. Both methods are authentic, depending on your experience and taste preferences.
Why does medium heat work better than high heat for making fudge?
Medium heat is best for fudge because it cooks evenly. High heat can create hot spots, ruining the texture. Medium heat ensures consistent bubbling, showing it’s cooking right.
You can tell if the heat is right by watching the bubbles. Gentle bubbling means it’s medium heat.
What role does evaporated milk play in traditional fudge recipes?
Evaporated milk adds rich flavor and helps with texture. It’s better than whole milk because it’s more concentrated. Sweetened condensed milk is sweeter but adds more water.
Evaporated milk gives fudge a creamy texture without too much water. It’s the perfect choice for traditional fudge.
How do I know when to incorporate chocolate into my fudge mixture?
Always add chocolate after removing the pan from heat. For chocolate chips, the hot sugar mixture will melt them as you stir. For cocoa powder, dissolve it in the hot mixture right away.
Adding chocolate while cooking can cause scorching or uneven melting. So, it’s best to remove the heat first.
What’s the difference between Scottish tablet and traditional Scottish fudge?
Scottish tablet is firmer and grainier, while traditional Scottish fudge is smooth. Both are rooted in Scottish candy-making traditions.
Tablet is cooked to a higher temperature, making it firmer. Traditional fudge uses sweetened condensed milk and sometimes whisky for flavor.
Why should I use unsalted butter for fudge making?
Unsalted butter lets you control the salt in your fudge. Salted butter can have too much salt, making it hard to control. Unsalted butter ensures your fudge is perfectly seasoned.
Butter’s fat also makes fudge melt in your mouth. It’s essential for that luxurious texture.
How long should I beat pure cocoa fudge to achieve the satiny sheen that indicates proper texture?
Beating pure cocoa fudge is a workout that takes several minutes. Use intervals of vigorous beating and resting to watch for the change in appearance.
When it becomes matte and satiny, it’s ready. Add nuts and spread it immediately because it sets quickly. Use a wooden spoon to avoid heat transfer.
What’s the proper way to cut homemade fudge for clean, attractive pieces?
Use a sharp knife warmed under hot water and dried between cuts. This ensures neat squares without crumbling. Wait until the fudge is fully set before cutting.
Warming the knife prevents dragging and creates smooth edges. If it’s hard to cut, try warming it in a low oven for a few minutes.
How should I store homemade fudge to maintain optimal texture and freshness?
Store fudge at room temperature (65-70°F) for the best results. Refrigeration can make it too firm and grainy. Excessive heat causes it to soften or develop an oily surface.
Use airtight containers to prevent drying out and absorbing odors. Store it in wax paper or parchment to prevent sticking. Properly stored, fudge stays fresh for up to three weeks.
Can I add nuts or dried fruits to traditional fudge recipes without compromising the texture?
Yes, you can add nuts and dried fruits if you do it right. Add them just before spreading the fudge in the pan. Use moderate amounts to avoid affecting the texture.
Make sure mix-ins are at room temperature to prevent cooling the fudge too quickly. Walnuts, pecans, and dried cherries work well. You can also add flavor extracts for a personal touch.
Why is quality chocolate important in fudge making?
Quality chocolate greatly affects your fudge’s texture and taste. Low-quality chocolate can make fudge grainy and separated. Premium chocolate melts smoothly and integrates well with sugar.
For cocoa powder, using high-quality pure unsweetened cocoa creates deeper flavor. Investing in quality chocolate or cocoa is crucial for traditional fudge success.
What’s the difference between a rolling boil and a gentle simmer?
A rolling boil is vigorous, continuous bubbling across the entire surface. A gentle simmer has sporadic bubbles. For fudge, you need a rolling boil for 4 minutes to ensure proper setting.
Stir constantly during this time to prevent burning and ensure even heating. Using a timer is essential to avoid undercooking or overcooking.
How can I serve fudge at summer celebrations while preventing it from melting?
Fudge is great for summer because it stays solid at room temperature. Serve it in shaded areas to avoid direct sunlight. Cut it into small pieces for easy handling at outdoor events.
Wrap individual pieces in wax paper or cellophane for convenience. Fudge pairs well with fresh berries, vanilla ice cream, or as a sundae topping. It’s also elegant on summer platters with fruit and cookies.
What’s the best way to incorporate chocolate chips versus unsweetened cocoa powder into fudge?
Add chocolate chips to the hot sugar mixture after removing from heat. Stir until they melt and become smooth. This method is easy and works well for marshmallow-based fudge.
For cocoa powder, dissolve it in the hot mixture right away. This creates a richer, more intense chocolate flavor. The choice depends on your taste and experience level.
Why does my fudge fail to set properly even when I reach the correct temperature?
Fudge not setting right can be due to several reasons. Using chocolate with too many additives can cause problems. Not stirring enough during cooking means sugar isn’t dissolved properly.
High humidity can also interfere with setting. If your fudge is still too soft, try storing it in a cool place for a few hours.
What is grandmother’s fudge recipe and why do family versions vary?
“Grandmother’s fudge recipe” is a treasured family tradition. Each family has their own version, influenced by regional tastes, ingredient availability, and personal touches. These recipes are passed down through generations.
They reflect the family’s history and preferences. Each version is unique and holds special meaning for the family.
Should I test my candy thermometer before making fudge?
Yes, definitely. Test your candy thermometer in boiling water to ensure it’s accurate. It should read exactly 212°F at sea level. If it’s off, adjust accordingly.
Position the thermometer correctly to avoid false readings. A thermometer that’s off by even a few degrees can ruin your fudge.
How does the Scottish approach to fudge differ from American traditional methods?
Scottish fudge-making focuses on quality ingredients and uses sweetened condensed milk. This creates a richer, more complex flavor. The Scottish method involves low-and-slow heating for a smooth texture.
Scottish fudge often includes whisky for added flavor. Luxury Scottish fudge makers use traditional techniques and premium ingredients, making it an artisanal treat.
What’s the significance of creating homemade fudge as a family tradition?
Making fudge is more than just candy-making. It’s a way to bond with your family and preserve traditions. It involves multiple generations working together, creating memories and strengthening family ties.
For many families, fudge is a way to identify themselves. It’s a treasured tradition that brings joy and connection. Continuing these traditions in today’s fast-paced world is meaningful and creates lasting memories.