Delicious Dark Chocolate Fudge Recipe Made Simple
Table of Contents
Delicious Dark Chocolate Fudge Recipe Made Simple
Imagine the smell of warm cocoa filling your kitchen. It’s like a memory of biting into something smooth and velvety. Making this decadent dark chocolate fudge at home is easy and fun.
You only need a few things from your pantry. This simple dark chocolate fudge recipe shows how easy it is to make your own sweets. It’s a great way to treat yourself or share with others.

Making an easy dark chocolate fudge is easy, even if you’re new to cooking. This dark chocolate fudge recipe is quick and still tastes amazing. Get ready to improve your dessert-making skills with these easy steps.
Key Takeaways
- Learn to create professional-quality sweets with minimal effort.
- Discover how basic ingredients yield impressive, rich results.
- Gain confidence in your kitchen skills with foolproof instructions.
- Save time by avoiding complicated traditional confectionery methods.
- Enjoy a homemade treat that is perfect for gifting or personal indulgence.
The Science Behind Perfect Homemade Dark Chocolate Fudge
Making homemade dark chocolate fudge is like a chemistry experiment. It’s all about managing fats and sugars. This lets you control the final result with great precision.
Understanding Cocoa Butter and Fat Content
The secret to a luxurious mouthfeel is in the fat content. Cocoa butter, found in good chocolate, is key. Adding fats like butter or condensed milk makes a stable mix.
This mix is what makes your treat melt in your mouth. Too little fat, and it might be dry or brittle. For a creamy dark chocolate fudge, keep these tips in mind:
- Choose chocolate with lots of cocoa butter.
- Make sure fats mix well during melting.
- Don’t overheat, or fats and solids will separate.
The Role of Sugar Crystallization in Texture
Sugar is crucial for your treat’s texture. If sugar bonds too fast, it can make your fudge gritty. To avoid this, you need to manage sugar crystallization well.
To control crystallization, dissolve sugar fully before boiling. Patience is your greatest tool here. By stopping crystals from growing too soon, your fudge stays smooth and silky.
Essential Ingredients for Your Dark Chocolate Fudge Recipe
Starting your journey to make homemade fudge begins with knowing your ingredients. The quality of these items is key to your dark chocolate fudge recipe success. Using top-notch ingredients ensures a professional touch every time you cook.
Selecting High-Quality Dark Chocolate
Don’t use standard chocolate chips for this dessert. They have stabilizers that stop them from melting right.
Go for a high-quality baking chocolate block with 60% to 70% cocoa. This gives a richer, more complex taste that makes your treat stand out.
Choosing the Right Sweetened Condensed Milk
Sweetened condensed milk is crucial for a simple dark chocolate fudge recipe. It adds moisture and sugar for a creamy texture.
Always pick full-fat versions for the best taste. This ingredient is key for that smooth, melt-in-your-mouth feel without needing fancy candy thermometers.
The Importance of Pure Vanilla Extract and Sea Salt
For the best dark chocolate fudge, focus on the finishing touches. Pure vanilla extract adds a rich aroma that balances the cocoa’s intensity.
A small amount of sea salt is also crucial. It enhances flavors, cutting sweetness and bringing out the dark chocolate’s nuances. Don’t skip these, as they elevate your fudge to gourmet levels.
Tools and Equipment You Need for Success
Starting your confectionery journey begins with the right tools. The right equipment makes creating creamy dark chocolate fudge easier and consistent.
Choosing the Right Saucepan for Even Heating
A heavy-based saucepan is crucial for your kitchen. It spreads heat evenly, preventing burns during melting.
Thin pans can cause hot spots, ruining your mix. A sturdy, thick-bottomed pot ensures your decadent dark chocolate fudge cooks evenly.
Selecting the Best Baking Pan for Setting
The size and material of your baking pan matter a lot. An 8×8 inch square pan is perfect for the right thickness.
Make sure your pan is clean and dry before starting. A high-quality metal pan helps your mix cool evenly, for a smooth finish.
Why a Silicone Spatula is Your Best Friend
A silicone spatula is great for mixing. It lets you scrape the bowl clean, saving ingredients.
Unlike metal tools, a silicone spatula folds ingredients well without air. This keeps your creamy dark chocolate fudge smooth and bubble-free.
Step-by-Step Guide to Preparing the Fudge Base
Mastering the fudge base is key to a professional result at home. By following these steps, your easy dark chocolate fudge will be perfect every time. Paying attention to detail here avoids common mistakes and leads to a delicious outcome.

Preparing Your Baking Pan with Parchment Paper
Start by preparing your workspace. Line your baking pan with parchment paper. This step is crucial for easy removal of the fudge once it’s set.
Leave a bit of paper over the pan’s sides. This makes it easy to lift the fudge out. A well-lined pan keeps your dessert intact and looks great when sliced.
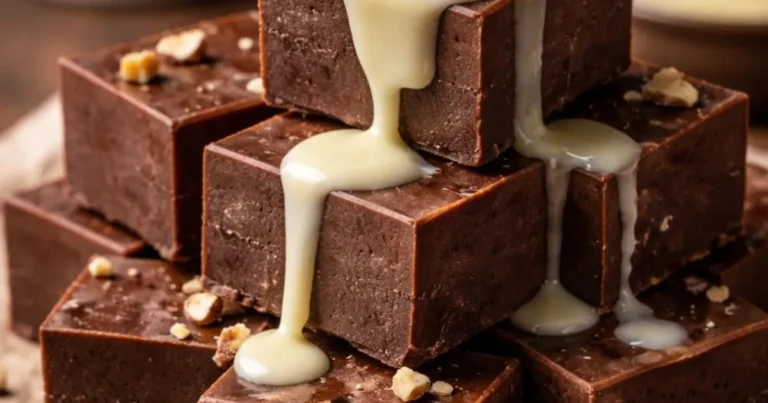
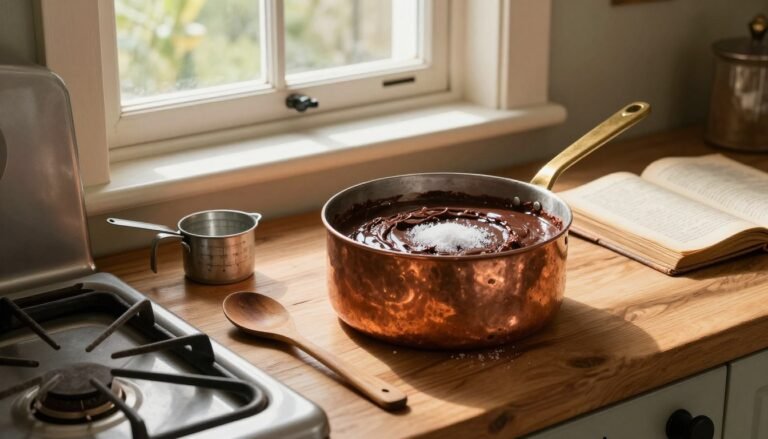
Melting Chocolate and Condensed Milk Safely
The secret to the best dark chocolate fudge is in the heat control. Use a low heat to avoid burning the chocolate. Slowly mix the chocolate and sweetened condensed milk for the best texture.
Stir constantly while heating. This ensures even heat and prevents a grainy texture. Rushing can ruin the fudge’s mouthfeel.
Achieving the Perfect Smooth Consistency
Look for a glossy, uniform appearance after melting. This is the sign of a simple dark chocolate fudge recipe done right. If there are lumps, stir gently until it’s smooth.
Patience is your greatest tool here. A smooth base means a velvety texture that melts in your mouth. Once smooth, you can add flavors or mix-ins.
Customizing Your Fudge with Mix-ins and Flavors
Customizing your fudge lets you make it special and unique. You can make a creamy dark chocolate fudge that impresses everyone. These tweaks add a gourmet touch to your creations.
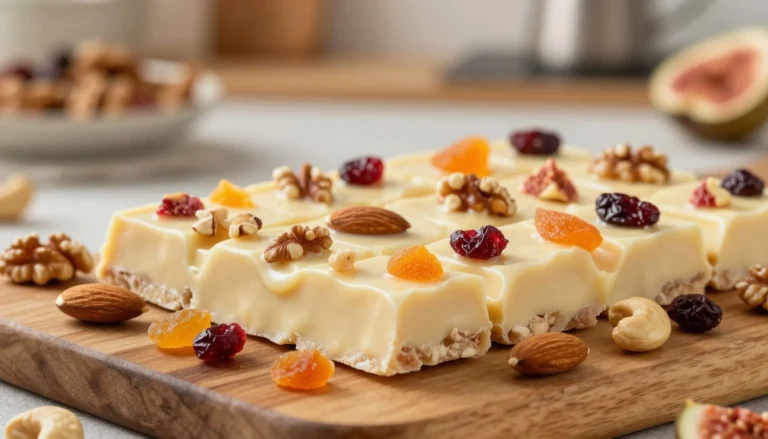
Adding Texture with Toasted Nuts
Adding nuts gives your fudge a nice crunch. Always toast your nuts first in a dry pan. This step makes them taste better and adds flavor to your dark chocolate fudge with nuts.
- Walnuts have a classic, earthy taste.
- Pecans are sweet and buttery, balancing the chocolate.
- Hazelnuts go well with dark chocolate’s deep flavors.
Infusing Flavors with Extracts and Spices
Extracts and spices add depth to your fudge. A little high-quality extract can change the whole taste of your creamy dark chocolate fudge. Here are some great pairings to try:
| Flavor Additive | Recommended Amount | Flavor Profile |
|---|---|---|
| Peppermint Extract | 1/2 teaspoon | Refreshing and cool |
| Orange Zest | 1 tablespoon | Bright and citrusy |
| Ground Cinnamon | 1/4 teaspoon | Warm and aromatic |
Incorporating Espresso Powder for Depth
Espresso powder makes the chocolate taste richer. It doesn’t make the fudge taste like coffee. Just whisk it into the condensed milk before adding chocolate to avoid clumps.
Adding Sea Salt for a Gourmet Finish
Sea salt adds a sophisticated touch. It balances the sweetness of the fudge. Sprinkle it on right after pouring the mixture into the pan for the best effect.
Techniques for Cooling and Setting Your Fudge
Proper cooling is key to turning a warm mix into firm, professional-looking squares. When making easy dark chocolate fudge, managing temperature is crucial. Rushing this step can result in a grainy texture or uneven set.
The Importance of Room Temperature Cooling
Always let your pan sit at room temperature before cooling it further. This slow cooling helps the cocoa butter and sugars stabilize. By doing this, your dark chocolate fudge squares will have a smooth, consistent texture.
When to Move Your Fudge to the Refrigerator
When the pan feels cool to the touch, it’s time to refrigerate it. Putting it in the fridge too soon can cause the fats to separate, ruining the glossy finish. Aim for two to four hours of chilling to ensure the fudge is firm for clean slicing.
Avoiding Common Pitfalls During the Setting Process
One big mistake is covering the pan while it’s still steaming. This trapped steam can drip back and make sticky spots. To keep your easy dark chocolate fudge looking perfect, wait until it’s completely cool before covering it.
| Cooling Stage | Duration | Goal |
|---|---|---|
| Initial Rest | 30-60 Minutes | Stabilize fats |
| Refrigeration | 2-4 Hours | Firm up texture |
| Final Setting | 15 Minutes | Perfect dark chocolate fudge squares |
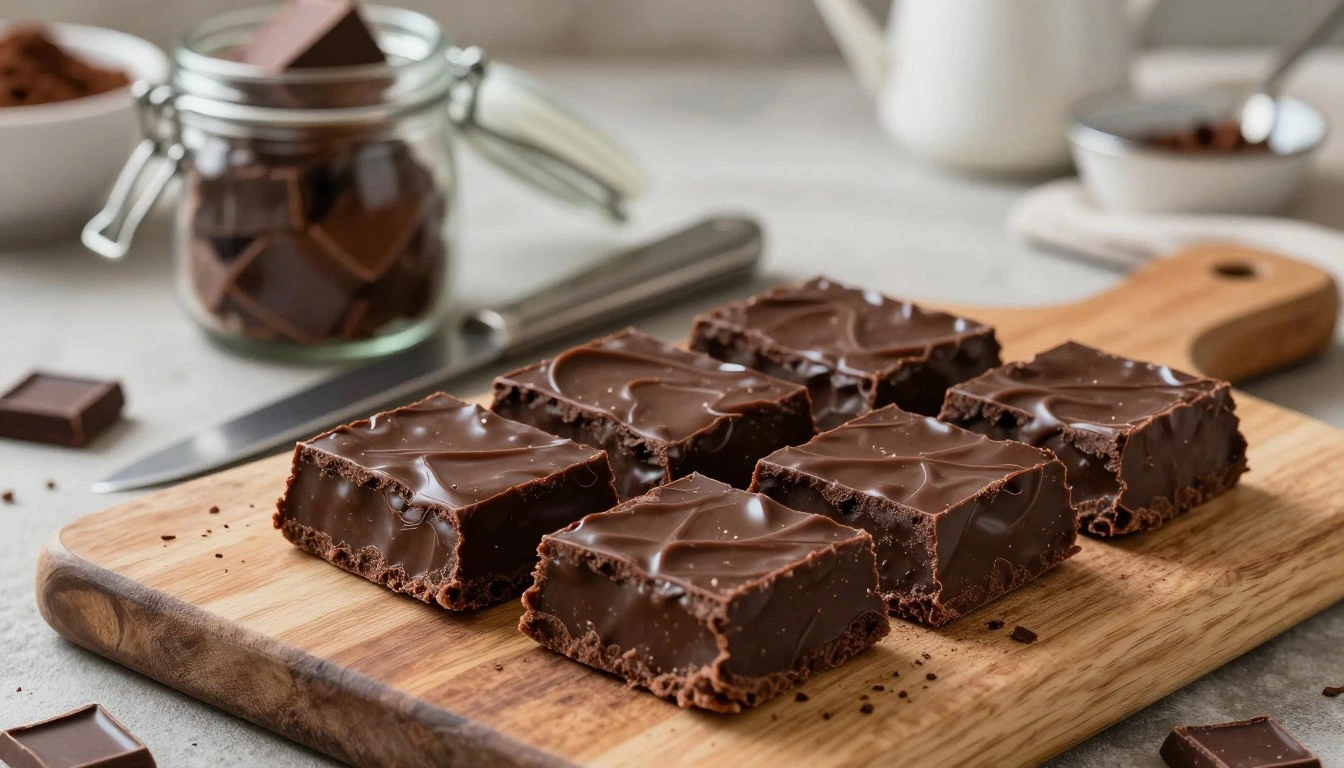
Slicing and Storing Your Decadent Dark Chocolate Fudge
Getting the perfect slice of homemade dark chocolate fudge needs patience and the right method. Once it’s fully set, make sure each piece looks as good as it tastes. This careful step prevents crumbling and keeps your slices sharp.

Tips for Clean and Professional Slices
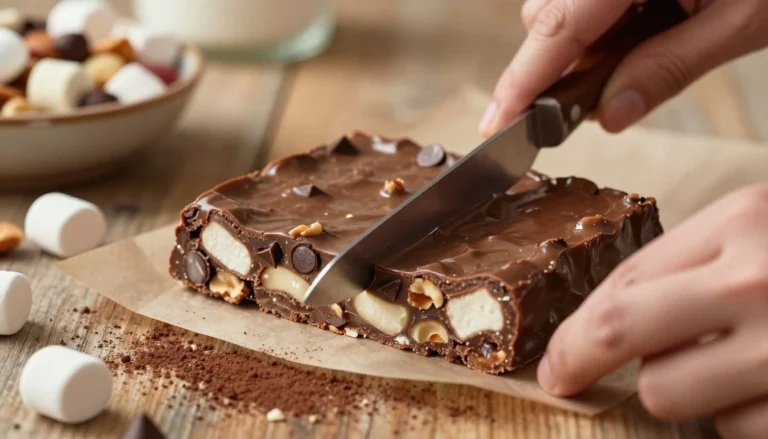
To get clean, professional edges, remove the block from the pan using the parchment paper. Place it on a sturdy cutting board. Warm your knife by running it under hot water and wiping it dry before each cut.
This trick helps the blade glide through the dense chocolate without dragging or cracking. If your fudge has nuts, use a gentle sawing motion to cut through them cleanly. This way, the nuts won’t pull the fudge apart as you slice.
Best Practices for Airtight Storage
Proper storage keeps your decadent dark chocolate fudge fresh. Air can dry out the surface or absorb odors from your fridge. Always use a high-quality airtight container to keep moisture and flavor in.
“The secret to long-lasting fudge is minimizing air exposure; a well-sealed container is your best defense against texture loss.”
Store your fudge at room temperature if your kitchen is cool and dry. But if it’s warm, the fridge is better to keep the pieces intact.
| Storage Method | Temperature | Shelf Life |
|---|---|---|
| Airtight Container | Room Temp | 1-2 Weeks |
| Sealed Container | Refrigerator | 3-4 Weeks |
| Wrapped & Sealed | Freezer | 3 Months |
How to Freeze Fudge for Long-Term Enjoyment
If you’ve made a lot, freezing is great for keeping it fresh for months. Wrap each piece in plastic wrap to prevent freezer burn. Then, put them in a heavy-duty freezer bag or a rigid container.
When you want to enjoy a piece, move it from the freezer to the fridge for a few hours. Slow thawing keeps the fudge creamy. Avoid thawing at room temperature to prevent texture issues.
Troubleshooting Common Fudge Making Issues
Fixing problems with your homemade treats is key for those who love making dark chocolate fudge squares. Even with a trusted dark chocolate fudge recipe, small changes can cause issues. Luckily, most problems can be fixed with a few tweaks.
Fixing Grainy or Gritty Texture
A grainy texture happens when sugar crystals form too fast or get too big. Make sure your chocolate and condensed milk mix is smooth before stopping. Avoid scraping the sides of the saucepan into your final mix, as these bits can cause crystals.
If your fudge feels gritty, try gently heating it with a bit of warm water. Stir slowly over low heat until the crystals melt. This trick often makes the fudge smooth again, perfect for the best dark chocolate fudge.
What to Do If Your Fudge Does Not Set
If your fudge is still soft after cooling, it might need more time or a cooler place. Check if your kitchen is too warm, which stops fats from solidifying. Move the pan to the fridge to help it set.
If it’s still runny after hours, the chocolate to liquid ratio might be wrong. Try adding a bit of melted chocolate to thicken it. Use high-quality chocolate for the best results.
Adjusting for Humidity and Kitchen Temperature
High humidity can ruin your fudge, as sugar absorbs moisture. On humid days, your fudge may take longer to set. Keep your workspace dry and avoid boiling water nearby.
Temperature is also crucial for your dark chocolate fudge squares. If your kitchen is too hot, the chocolate fats won’t firm up right. Use the table below for quick fixes to common problems.
| Issue | Primary Cause | Recommended Fix |
|---|---|---|
| Grainy Texture | Sugar crystallization | Reheat gently with water |
| Soft/Runny | Excess moisture or heat | Refrigerate or add chocolate |
| Oily Surface | Overheating chocolate | Stir in a teaspoon of milk |
| Hard/Brittle | Overcooking | Add a splash of warm cream |
Conclusion
Making sweets at home feels incredibly rewarding. You now know how to make a rich homemade dark chocolate fudge. It’s as good as what you find in stores like Ghirardelli or Lindt.
Starting your candy-making journey opens up a world of possibilities. You can try adding nuts like toasted walnuts or salted pecans to your fudge. This makes the fudge even tastier and adds a nice crunch.
Sharing your homemade treats brings happiness to those around you. Whether it’s during holidays or just a casual get-together. Keep improving your skills, especially with temperature and ingredient quality. This way, every batch of fudge will be a hit.
Begin making your next batch today. See how easy it is to turn simple ingredients into gourmet treats. Your kitchen is the perfect place to try new recipes, like dark chocolate fudge with nuts. Enjoy making your own special treat for everyone to enjoy.
FAQ
Can I use standard chocolate chips for this easy dark chocolate fudge?
While you can use chips, for the best dark chocolate fudge results, use high-quality baking bars. Brands like Ghirardelli or Guittard are best. Chocolate chips often have stabilizers that can prevent your fudge from being smooth.
How do I ensure my dark chocolate fudge squares have clean, sharp edges?
To get perfect squares, line your Pyrex dish with Reynolds Kitchens parchment paper. After setting in the fridge, dip a sharp knife in hot water and wipe it dry. Slice the fudge in one smooth motion, cleaning the blade between cuts.
Why is this considered a simple dark chocolate fudge recipe compared to traditional methods?
This recipe is simple because it uses Borden Eagle Brand sweetened condensed milk. It skips the need for a candy thermometer and the complex boiling required in old recipes. This makes it easy for beginners to make with confidence.
What is the best way to incorporate texture into a dark chocolate fudge with nuts?
To make a premium fudge with nuts, toast your walnuts or pecans in a Le Creuset skillet. Then, fold them into the chocolate base. This adds a deeper flavor and a satisfying crunch that goes well with the creamy fudge.
How can I fix a grainy texture in my dark chocolate fudge recipe?
A grainy texture often comes from sugar crystallization or overheating. To avoid it, melt your ingredients over low heat and stir gently with a silicone spatula. If it gets grainy, try gently reheating it with a little heavy cream to dissolve the sugar crystals.
How long should I store my homemade dark chocolate fudge to keep it fresh?
Your fudge will stay fresh for up to two weeks in an airtight Tupperware container at room temperature. For longer storage, wrap individual pieces in wax paper and freeze in a Ziploc bag for up to three months.
Does the brand of vanilla extract really matter for the best dark chocolate fudge?
Yes, it does. Use a high-quality pure vanilla extract, like Nielsen-Massey, and a pinch of Maldon sea salt. These enhance the flavor, cutting through sugar and highlighting the cacao notes in your fudge.
Why does my decadent dark chocolate fudge feel too soft even after cooling?
If your fudge is too soft, it might be due to high humidity or using low-fat condensed milk. Use full-fat Eagle Brand and let it cool for at least four hours. If it’s still soft, try using a higher cocoa percentage in your chocolate bar.