Kitchen Aid Ice Cream Recipe for Perfect Homemade Treats
Table of Contents
Kitchen Aid Ice Cream Recipe for Perfect Homemade Treats
There’s something magical about the sound of a churning bowl on a warm summer day. You might remember the excitement of waiting for a frozen treat to set. Then, the first smooth, cold spoonful was always a highlight.
Now, you can make those memories again at home. With your stand mixer attachment, you can whip up two quarts of delicious ice cream whenever you want.

This method is a hit with home cooks. It gives unmatched consistency and is super easy to use. By learning this simple trick, you’ll wow your loved ones with ice cream that’s as good as any shop’s.
Key Takeaways
- Churning your own frozen desserts is simple with the right mixer attachment.
- The process yields two full quarts of high-quality treats.
- Home cooks prefer this method for its reliable and smooth results.
- You can easily customize flavors to suit your personal preferences.
- Mastering these steps allows you to host impressive gatherings with ease.
Understanding Your KitchenAid Ice Cream Attachment
Turning your kitchen into a creamery starts with learning about your freezer bowl. Mastering this tool lets you make homemade ice cream recipe kitchen aid fans love. It turns your stand mixer into a powerful churning machine.
How the Attachment Works
The attachment uses a special dasher that moves inside a double-walled freezer bowl. As it spins, it scrapes the mixture against the deeply chilled bowl walls. This prevents big ice crystals, making the ice cream smooth and creamy.
The bowl works with any 2-quart ice cream maker machine. It churns your base evenly. This makes your ice cream light and creamy, just like store-bought.
Preparing the Freezer Bowl for Success
Success starts before mixing. Make sure your freezer bowl is completely frozen before use. If it’s not cold enough, your ice cream won’t turn out right.
To make sure your simple kitchen aid ice cream recipes work every time, follow these tips:
- Store the freezer bowl in the coldest part of your freezer for at least 15 to 24 hours.
- Check that the bowl is completely dry on the outside before placing it in the freezer to prevent frost buildup.
- Ensure your freezer temperature is set to 0°F (-18°C) or lower for the best results.
- Keep the bowl in the freezer until the very last second before you are ready to churn.
By following these steps, you’re ready to churn your ice cream. Proper preparation is key for any simple kitchen aid ice cream recipes. Once your bowl is chilled, you can start making perfect homemade ice cream.
Essential Ingredients for Premium Homemade Ice Cream
Making delicious kitchen aid ice cream recipes begins with choosing the best ingredients. The machine does the hard work, but the quality of your ingredients makes all the difference. Quality matters for that smooth, velvety texture at home.
The Role of High-Quality Dairy
The base of any top-notch frozen treat is its fat content. Mixing heavy whipping cream with whole milk adds richness. High-fat dairy keeps your ice cream smooth by preventing icy crystals.
Always pick fresh, full-fat dairy for the best results. Low-fat options can’t hold air well during churning. Here’s how different dairy types affect your ice cream:
| Dairy Type | Fat Content | Resulting Texture |
|---|---|---|
| Heavy Cream | 36-40% | Very Rich and Creamy |
| Whole Milk | 3.25% | Light and Refreshing |
| Half-and-Half | 10-12% | Balanced and Smooth |
Balancing Sugar and Stabilizers
Sugar is more than just sweetness. It’s a critical chemical agent that lowers the freezing point. This makes your ice cream scoopable, not hard as a rock.
In delicious kitchen aid ice cream recipes, exact sugar amounts are key. Too much sugar stops the mixture from setting, while too little makes it icy. Finding the right balance is the key to perfect homemade ice cream.
The Ultimate Kitchen Aid Ice Cream Recipe for Beginners
Making a tasty treat at home starts with a good kitchen aid ice cream recipe. Learning a basic recipe lets you try many flavors. The key is to prepare well and be patient before starting.
Gathering Your Ingredients
You’ll need heavy cream, whole milk, sugar, and salt to begin. These simple kitchen aid ice cream recipes need fresh ingredients for a creamy taste. If your ice cream maker is small, adjust the recipe to fit.
Make sure your dairy is cold before starting. Warm ingredients can make the ice cream icy. Keeping your mix cold is very important for a smooth texture.
Step-by-Step Mixing Process
Start by mixing sugar and dairy in a big bowl until the sugar dissolves. You can add vanilla extract for extra flavor. Then, refrigerate the mix for at least two hours, or overnight.
When it’s time to churn, pour the cold mix into your frozen bowl while the mixer is slow. Don’t fill the bowl too much, as the mix will grow. Following these simple kitchen aid ice cream recipes helps your machine work well and avoids messes.
Mastering the Churning Process
Getting good at moving your ice cream maker is key to making pro-quality ice cream at home. The ingredients give it flavor, but the mixer’s action gives it structure. Patience is crucial here to get a smooth, professional taste.

Setting the Correct Speed
Start by turning your mixer to the lowest speed. A slow speed is essential for mixing in air without melting the mixture too soon. This slow pace keeps the freezer bowl cool.
Running the mixer too fast can lead to big ice crystals or splashing. Keep the speed steady to get a uniform texture. This careful approach is what makes many easy kitchen aid ice cream recipes work so well.
Monitoring Texture and Consistency
Watch the mixture as it thickens in the bowl. Make sure there’s enough room for it to expand as it freezes. If it can’t expand, it won’t get that luxurious, fluffy texture you want.
Look for when the mixture turns into soft-serve, usually in 15 to 20 minutes. When it looks like whipped cream, it’s time to put it in a container for freezing. By following these steps, you’ll make ice cream that’s as good as your favorite shop’s.
Flavor Variations and Mix-in Techniques
Adding mix-ins to your ice cream base takes your homemade ice cream to the next level. With easy kitchen aid ice cream recipes, you can turn a simple custard into a gourmet treat. Try different ingredients to match your taste or what’s in season.
Adding Fruits and Purees
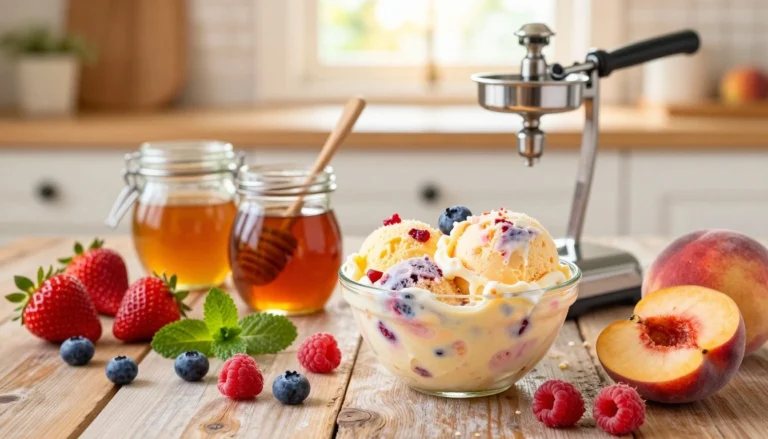
Fresh fruit adds a natural sweetness that makes any ice cream better. Strawberry, peach, and blueberry are great choices. Puree or chop the fruit before adding it to your mix.
To get the best flavor, mix in fruit purees during the last minute of churning. This keeps your ice cream creamy and flavorful. Using fresh, seasonal fruit makes your ice cream the best it can be.
“The secret to a perfect dessert lies in the balance of textures and the freshness of your ingredients; never be afraid to experiment with what is in season.”
— Culinary Arts Monthly
Incorporating Crunchy Elements and Swirls
Adding crunch or swirls is the last step in making these easy kitchen aid ice cream recipes perfect. Choose from toasted nuts, dark chocolate chips, or caramel ribbons. Add them in the last 30 seconds to keep them evenly distributed.
For beautiful swirls, wait until the ice cream is soft-serve consistency. Drizzle your sauce or jam in layers and fold gently. This creates a stunning, marbled look that’s as delicious as it is beautiful.
| Mix-in Type | Preparation Method | Best Timing |
|---|---|---|
| Fresh Fruit | Pureed or diced | Last 60 seconds |
| Chocolate Chips | Keep chilled | Last 30 seconds |
| Nut Pieces | Toasted and cooled | Last 30 seconds |
| Caramel Swirl | Room temperature | During packing |
Follow these tips for consistent flavor in every scoop. These easy kitchen aid ice cream recipes are a great starting point for your creativity. Enjoy making your own unique flavors at home.
Troubleshooting Common Ice Cream Making Issues
Even the best kitchen aid ice cream recipes can sometimes result in unexpected textures. Small changes in temperature or ingredient ratios can affect your final result. Knowing how to spot these common problems will help you make professional-quality desserts every time.
Fixing Icy or Grainy Textures
An icy or grainy texture often comes from large ice crystals. This usually happens if your base is not cold enough before it enters the machine. Or if the freezer bowl has not been chilled for the full 24 hours. Always ensure your bowl is completely frozen to help with a rapid churn.
Another common problem is an improper balance of sugar and fat. Sugar helps prevent the mixture from turning into a solid block of ice. If your ice cream feels too hard or icy, try adding a bit more sugar or heavy cream to improve its texture.
“The secret to a smooth, velvety texture lies in the speed of the freeze; the faster the base cools, the smaller the ice crystals will be.”
Addressing Over-Churning Problems
Over-churning is a common mistake that can ruin your dessert. When you churn for too long, the fat globules in the dairy clump together. This results in a buttery, greasy texture instead of a smooth, creamy one.
To avoid this, watch your machine closely as the mixture thickens. Stop the churn when the ice cream reaches a soft-serve consistency. Even with the best kitchen aid ice cream recipes, your environment can affect timing. So, rely on visual cues rather than just the clock.
If your batch becomes too thick, transfer it to an airtight container right away. Placing it in the freezer for a few hours will help it set properly. Remember, practice makes perfect. Minor adjustments to your timing will lead to better results in future batches.
Storing and Serving Your Homemade Treats
Your journey to the best kitchen aid ice cream recipes ends with storage and serving tips. After churning, your dessert’s texture is delicate. It’s important to handle it right to keep it creamy until you’re ready to eat it.
Proper Container Selection
Choosing the right container is key to keeping your dessert fresh. Most batches fit in a 2-quart container. If you have a 4-quart machine, you’ll need something bigger. Always pick airtight containers to stop ice crystals and freezer burn.
“The secret to a perfect frozen dessert lies not just in the ingredients, but in how you protect its structure from the harsh environment of your freezer.”
Use shallow, wide containers for even freezing. This is a key part of the best kitchen aid ice cream recipes. Make sure your container is clean and dry before putting in your ice cream.
Achieving the Perfect Scoop
To serve your ice cream right, you need to wait a bit for the right consistency. If it’s too hard, let it sit at room temperature for five to ten minutes. This makes scooping easier.
Using a good, heated ice cream scoop can also improve your presentation. By following these tips for the best kitchen aid ice cream recipes, your dessert will look as good as it tastes. Serve it in chilled bowls to slow down melting.
Advanced Techniques for Professional Results
You can make your ice cream velvety and professional with a few expert tips. Basic recipes are tasty, but mastering advanced techniques boosts your ice cream’s quality. These methods help you control the texture and taste of your frozen treats.

Tempering Eggs for Custard Bases
For a rich custard ice cream, adding egg yolks carefully is key. Tempering is the technique to slowly warm the eggs. This prevents them from scrambling when mixed with hot milk.
To temper, whisk the yolks in a bowl. Then, slowly add hot milk to them while stirring. After warming the eggs, mix them back into the saucepan. This method avoids curdling and gives your ice cream a luxurious, dense texture.
Experimenting with Dairy-Free Alternatives
If you follow a special diet or prefer plant-based options, you can modify your recipes. Full-fat coconut milk is a great substitute for its creamy texture. Almond milk works too, but you might need to add guar gum for a creamier feel.
Remember, non-dairy bases freeze differently than regular cream. You might need to adjust the churning time. Trying out these alternatives lets you make treats that fit your lifestyle.
Cleaning and Maintaining Your Attachment
Keeping your equipment in good shape is key to enjoying tasty frozen treats for years. Taking care of your gear is as important as choosing the right ingredients for your favorite recipes. By following a few simple steps, you can keep your machine in top condition.
Safe Washing Practices
The freezer bowl needs gentle care to work well. You must never place the bowl in the dishwasher because the heat can harm the cooling liquid inside. Here are some tips for cleaning it right:
- Let the bowl cool down to room temperature before washing to avoid damage.
- Use warm, soapy water and a soft cloth or sponge to clean it inside and out.
- Rinse well and dry the bowl completely with a soft towel.
- Wash the dasher and drive assembly in warm, soapy water or on the top rack of your dishwasher.
Long-Term Storage Tips
Proper storage is crucial when you’re not using your attachment. Always make sure the bowl is completely dry before putting it back in the freezer. Moisture can cause ice to form, which might affect the bowl’s performance.
Store the bowl flat in your freezer so it’s ready for your next batch of recipes. Don’t stack heavy items on top of it to avoid dents or punctures. Keeping your equipment clean and stored properly ensures it’s always ready for your next culinary project.
Safety Guidelines for Homemade Dairy Products
Exploring kitchen aid ice cream maker recipes is fun, but safety comes first. Making dairy-based desserts at home is rewarding. Yet, it demands attention to detail. By sticking to hygiene practices, your treats will be tasty and safe for your family.
Temperature Control and Food Safety
Keeping the right temperature stops harmful bacteria in your dairy mix. Always refrigerate milk, cream, and custard bases at 40°F or below. Never leave your ice cream base out for too long, as it’s a breeding ground for bacteria.
After churning, move your ice cream to a freezer-safe container right away. Store it in the coldest part of your freezer. This keeps the texture and prevents ice crystals. Make sure your freezer is at 0°F or lower for food safety.
Handling Raw Ingredients Safely
Many kitchen aid ice cream maker recipes use egg yolks for a creamy texture. But raw eggs can be risky, like Salmonella. Always use pasteurized eggs to lower the risk of contamination.
If your recipe needs a cooked custard base, temper the eggs carefully. Slowly add hot liquid to the eggs while whisking. This method thickens the base safely and keeps your dessert quality high.
| Ingredient/Process | Safety Requirement | Temperature Limit |
|---|---|---|
| Dairy Storage | Keep tightly sealed | 40°F or below |
| Custard Base | Cook until thickened | 160°F internal |
| Finished Ice Cream | Store in airtight container | 0°F or below |
Conclusion
Turning your kitchen into a parlor is easy with homemade ice cream. You control every ingredient that goes into your bowl.
Try new flavors to keep your desserts exciting all year. You could make classic vanilla bean or pumpkin spice for your guests. These recipes let your creativity shine.
Your KitchenAid mixer makes churning ice cream easy. You can fix texture issues and keep your equipment in top shape. With practice, you’ll get better at making different flavors.
Share your ice cream with friends and family to make them happy. Your adventure in making frozen treats begins here. Keep trying new flavors to find your favorite.
How long does it take to churn a kitchen aid ice cream recipe?
Most easy kitchen aid ice cream recipes take 15 to 25 minutes on the “Stir” speed. Stop when it reaches a soft-serve consistency.
Why is my homemade ice cream recipe kitchen aid batch not thickening?
It might be due to a cold freezer bowl, warm base, or a too-warm freezer. Ensure the bowl is frozen and the base is chilled.
What are the best kitchen aid ice cream recipes for beginners?
Start with a simple Philadelphia-style base. It’s easy to make and doesn’t require cooking eggs.
Can I use the kitchen aid ice cream attachment recipes for dairy-free options?
Yes! Use full-fat coconut milk or cashew milk as substitutes. Many delicious kitchen aid ice cream recipes work well for vegan diets.
When should I add mix-ins to my kitchen aid ice cream maker recipes?
Add solid mix-ins like nuts or chocolate chips in the last 1-2 minutes. This ensures even distribution.
How do I prevent freezer burn on my kitchen aid ice cream attachment recipes?
Store in an airtight, shallow container. Press plastic wrap onto the ice cream surface before sealing.